
Making A Large Box
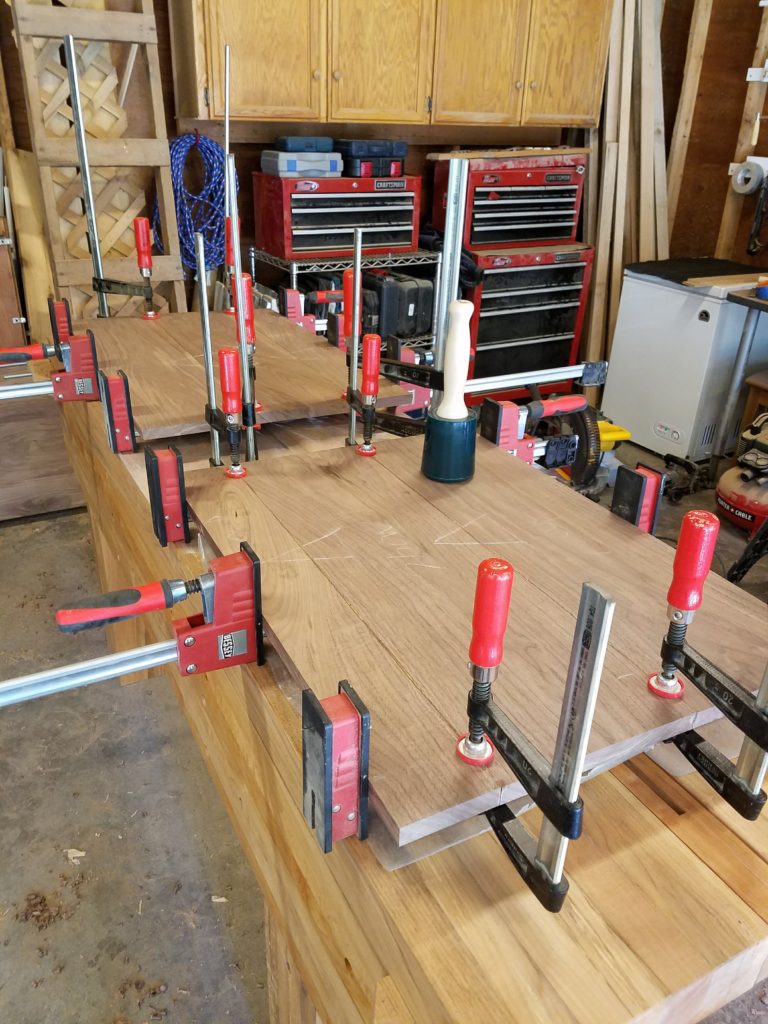
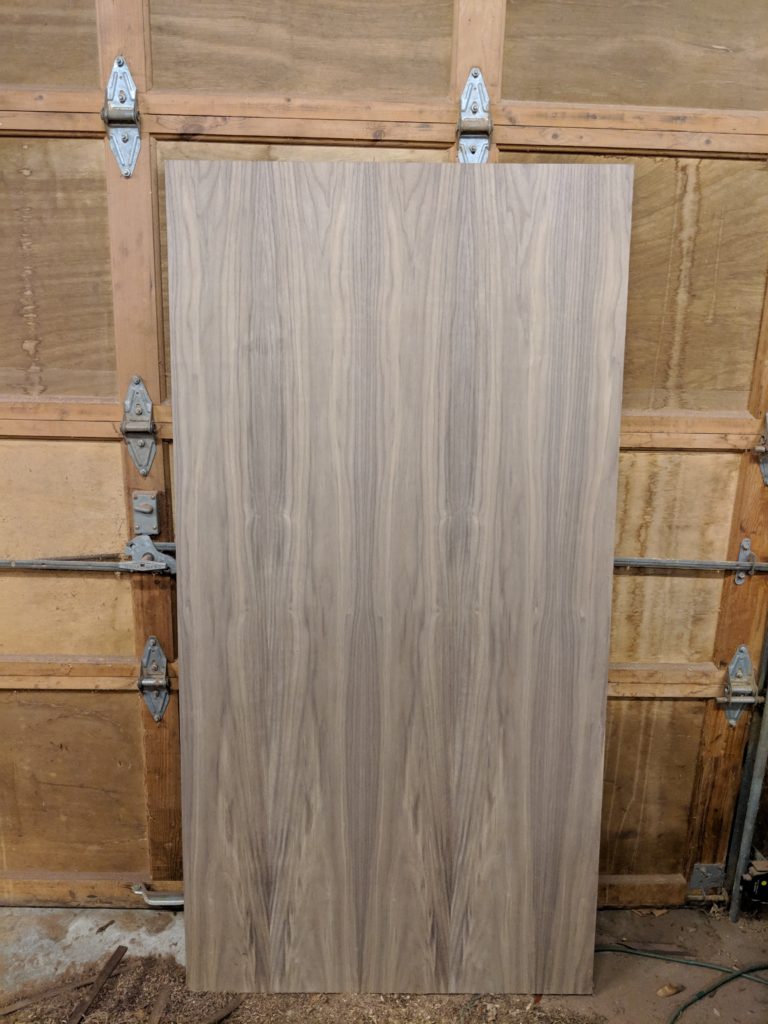
Back at the garage, I used my thickness planer to bring the 4/4 down to its final thickness of 13/16″ and clean up all the hit and miss planer marks left from the saw mill. I then used the straight line edge as a reference against the fence of my table saw to rip the boards to width. For the common boards without a straight line, I used a table saw sled which will create a straight edge that you can flip over and rip the opposing rough edge to width. Much time was spent agonizing over which faces to match in which orientation so that the grain patterns didn’t look disjointed and the line disappeared as much as possible. Once I figured that out, I jointed all the matched edges for the top and sides with my Lie-Nielsen low angle jack plane and used biscuits to align the panel faces. With ample clamping pressure from my parallel clamps, the seams pulled together tightly with glue squeeze out across the entire line. I let it dry overnight and then finished all the inside surfaces with my jack plane set to take a very fine shaving. No sandpaper was used for surface prep on this project. More on that later.
Dovetails
There are so many methods for cutting dovetails that one could spend a whole year just watching YouTube videos on all of them. I chose to use the divider method to layout the dovetails because it creates consistency in their layout and symmetry in the final product. Here is a great video on YouTube by Chris Schwartz on how to do this.
The Tails
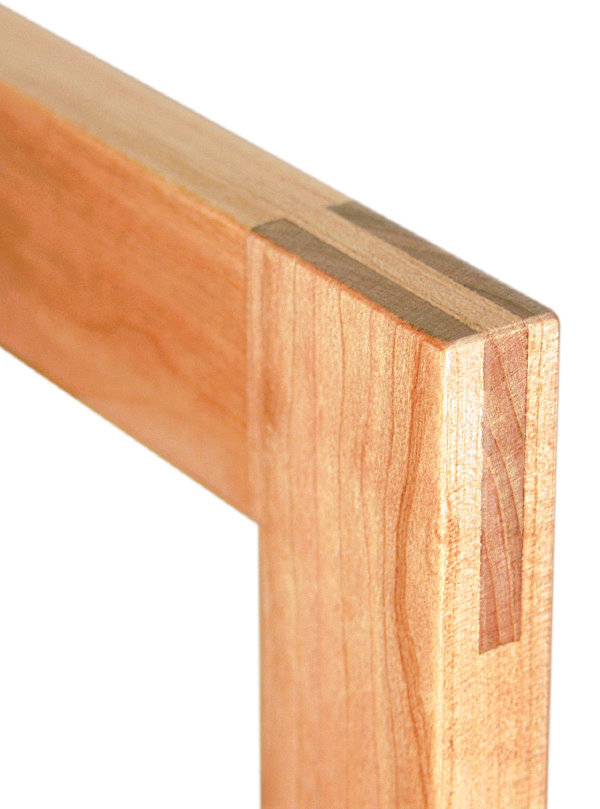
I like to layout and cut the tails first starting with my marking gauge and two pairs of dividers mentioned previously. Narrow pins and wide half-pins at the ends look better to my eye. I used the Katz-Moses dovetail guide to ensure all the cuts were square to the face and at the correct angle which will create a perfect 6:1 dovetail ratio. I understand that many master dovetailers do this by feel but I am not quite there yet. I like the Japanese dozuki saw for cutting dovetails. They are easier to start the cut than western push saws in my opinion. People just rave about the Knew Concepts fret saw for removing waste between the tails, so I had to try it. I am a fan. After chiseling down to my marking gauge line with a slight undercut, I lined up the finished tails with the side panels and transferred the lines for the pins using a marking knife.
The Pins
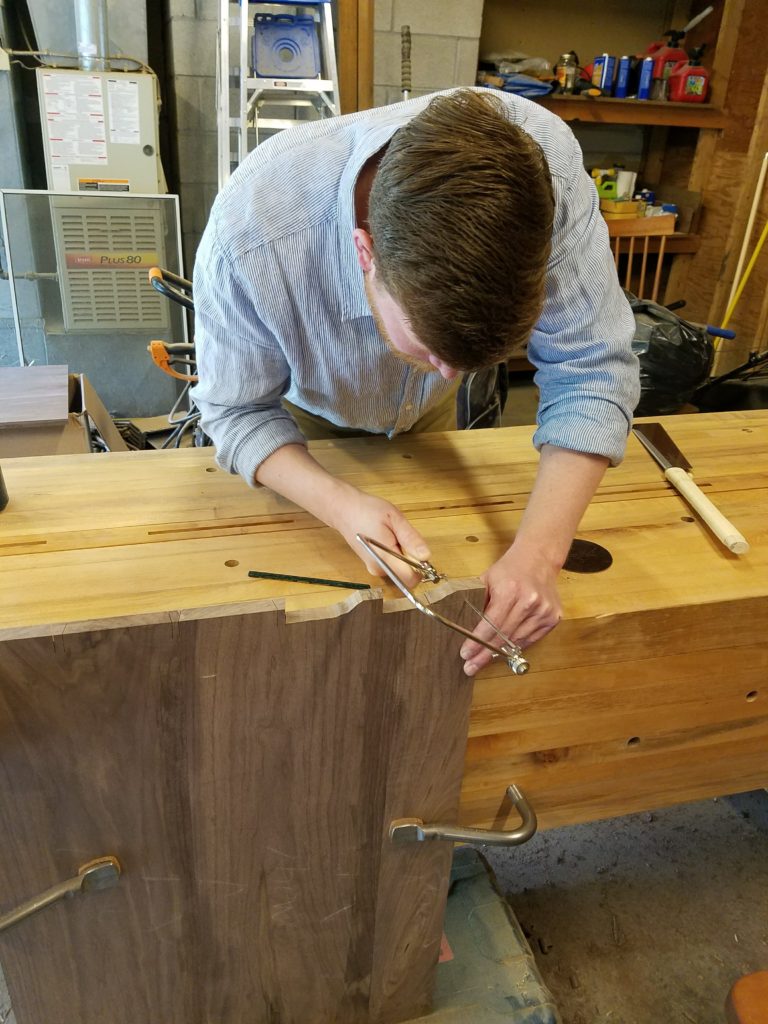
After breaking a few fret saw blades trying to cut out all the waste between the pins, I reverted back to my coping saw because it cuts far more aggressively and the blade is more durable. I used swooping cuts since the blade is wider and won’t turn 90 degrees in the thin saw kerf created by the dozuki saw like the fret saw will. Finally, I chiseled down to my marking gauge line using the widest chisel I have to create the straightest shoulder lines possible. I have found that if you try to chisel too thick of a cut, not only can you drive the chisel past your marking gauge line but you can actually blow out the wood fibers in the center of the board when you flip the board over to chisel the opposing side. This is because the fibers are no longer supported since you chiseled out the supporting waste on the other side. I am not certain how to avoid this other than by taking very fine cuts with a razor sharp chisel. It tends not to matter so much because the cavity left by the blown out fibers is concealed within the dovetail after glue up and is never seen but it could be a problem if the fibers blow out far enough into the face of the board.
Dados
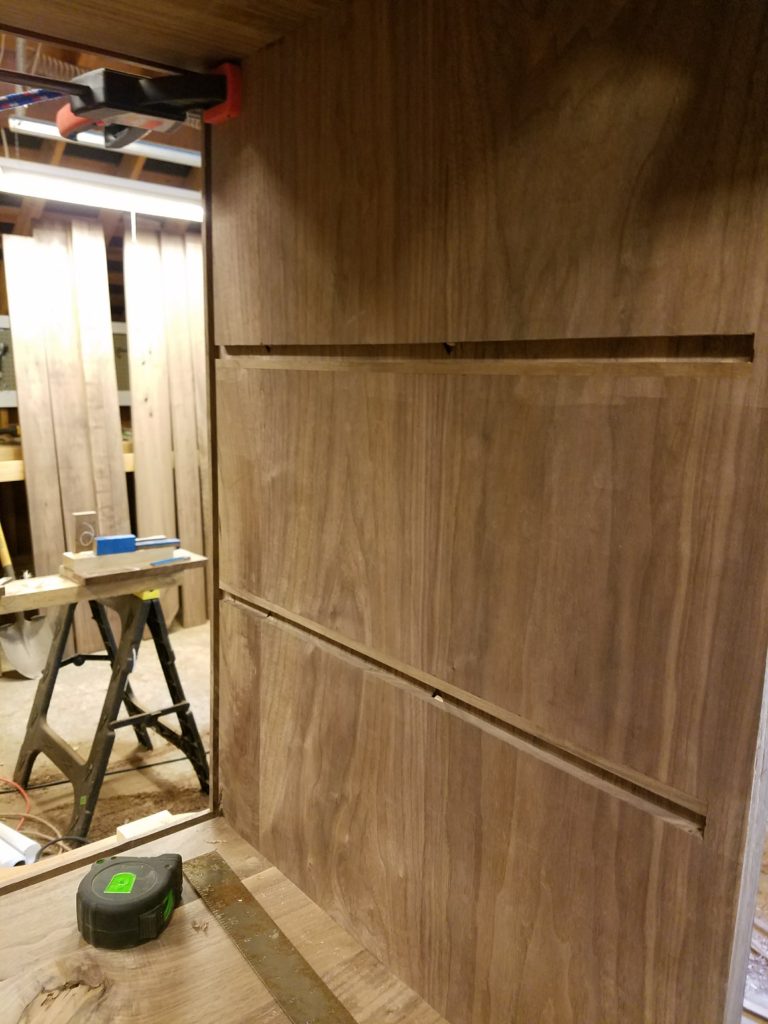
For the dados that will take the drawer divider tenons, I decided to use a router with a half inch spiral upcut bit to route the grooves. I saw a YouTube video from The Samurai Carpenter where he made a router base out of Plexiglas and drilled holes along all four edges to create a wide support surface where you can attach a fence that can be micro-adjusted to whatever offset you want, all for like $20 in materials. So I made one of these bases and it was money well spent. I marked out the grooves and set the plunge router to 3/8″ depth of cut. I used the fence attachment set to 3/8″ offset to route the grooves that will receive the case back, making sure to stop short on the pins sides so as not to exit the pin. I clamped a straight edge to the case sides to register the router base against and cut the grooves for the horizontal and vertical dividers, stopping short of the front edge since the dividers are inset into the case. I actually messed up here and didn’t divide the side dados equally into three parts. Not sure what happened but I had to start over by plugging the incorrectly placed grooves with strips of walnut and re-routing the grooves in the correct place. A lesson in measure twice, route once.
Back Panel
I had to make an additional trip to Crosscut Hardwoods to buy some walnut veneered plywood since I was not about to use solid wood for the case back and drawer bottoms. This stuff is expensive but beautiful. I purchased three sheets of half inch seven-ply with matching rotary cut flitches on both sides.
Back at the garage, I had to use my circular saw with an edge guide to cut the panels to length and width since they were too large for my table saw. This was a pain and really made me wish I had a track saw. Nonetheless, I managed to get them 1/16″ short of the inside dimension of the dado grooves they would fit into and perfectly square.
I realized somewhere along the way that I needed to pre-finish the panels before assembly so there would not be a gap in the finish if they ever moved. After much research and testing, I decided I would use Watco Danish Oil Light Walnut as the finish for this dresser because it is a penetrating oil that doesn’t leave a film on the surface and also made the contrast between the light and dark tones in the walnut pop. During my testing process, I also discovered that the walnut veneer plywood looked more yellow with this stain than did the solid hardwood. This problem was solved by using the Black Walnut stain color choice which, when dry, blended nicely with the Light Walnut stain on the hardwood. I set the panels aside to dry.
Drawer Dividers
For the center vertical divider, I edge glued some solid walnut boards, just like the case sides, but instead of dovetails I used a dado stack in my table saw to cut the tenons to fit into the grooves in the case top and bottom mentioned earlier. I kept the depth of the divider 7/8″ short of the front face of the case so the drawers could inset. I also haunched the front edge of the tenon so that it covered the end of the dado. I considered using sliding dovetails here but couldn’t since they would have to slide in from the back and the dado that secured the case back would prevent this. I used the same method to route the dados in the center divider as I did in the case sides, making sure that they were at equal heights this time.
The horizontal drawer dividers were much more involved than the vertical one. I wanted to incorporate dust shields between the drawers so I used a frame and panel design just like you would see on a kitchen cabinet door. I milled the walnut frame rails and stiles to thickness, length and width and then pulled out my Delta table saw tenoning jig. This is a wonderful jig for cutting bridle joints. It has a micro adjust for the cheek cuts that will give you a perfect slip fit. I cut the shoulders on the tenons with a mitre gauge on the table saw.
For the dust shields panels, I used the dado stack on the table saw to cut a groove in the rails and stiles making sure to use a start & stop block so as not to exit the tenon sides.
Glue-up meant applying ample Titebond III to the tenon cheeks of the rails and sliding the plywood panels into place before slipping the the rails into the stiles and completing the bridle joint. The plywood panel has no glue so it is able to move. I planed all surfaces with the jack plane and pre-finished everything with Danish oil prior to assembly
Assembly
Before final glue up, I needed to finish the inside faces of the case since doing this post assembly would be impossible. I used my Lie-Nielsen low angle jack plane set for a finishing cut to plane the inside surfaces followed by the Danish oil finish.
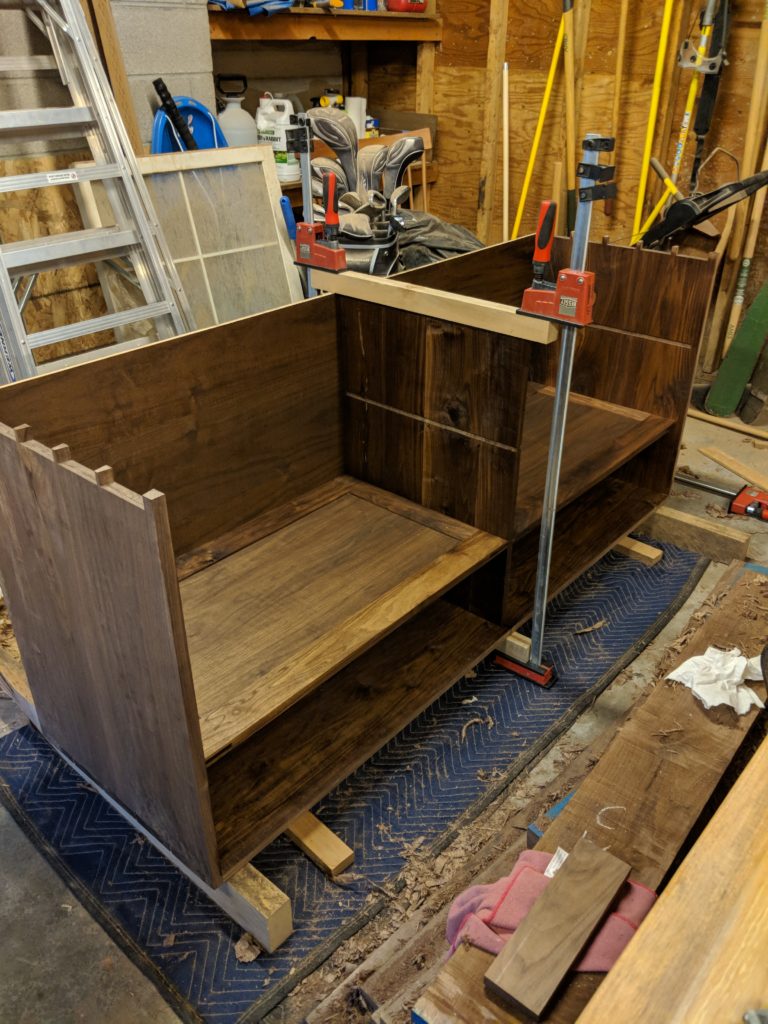
Glue up time! I decided to do this in stages. First, I glued the bottom dovetails only and squared everything up while it dried overnight. This was primarily due to the fact that I had to slide in the back panel and install the dividers before enclosing the entire assembly.

Sliding in the back panel was the easy part. The horizontal and vertical dividers were more difficult. Because the tenons on the dividers had to slide into the dados in the case, the geometry of the everything was such that I had to install all five dividers at the same time which is always more stressful when you have to work quickly since you don’t have any time to troubleshoot problems if things go wrong, which is the argument for always doing a dry fit. Fortunately everything worked out this time. Finally, I glued up the top dovetails, thus enclosing the entire case assembly and let everything dry overnight.
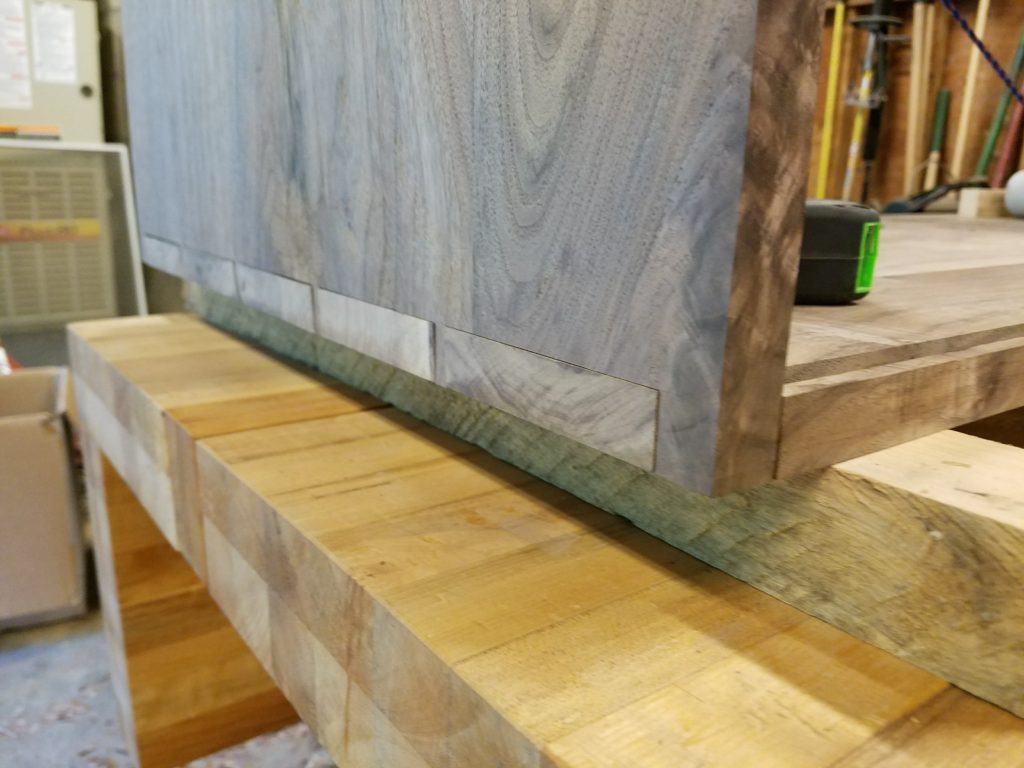
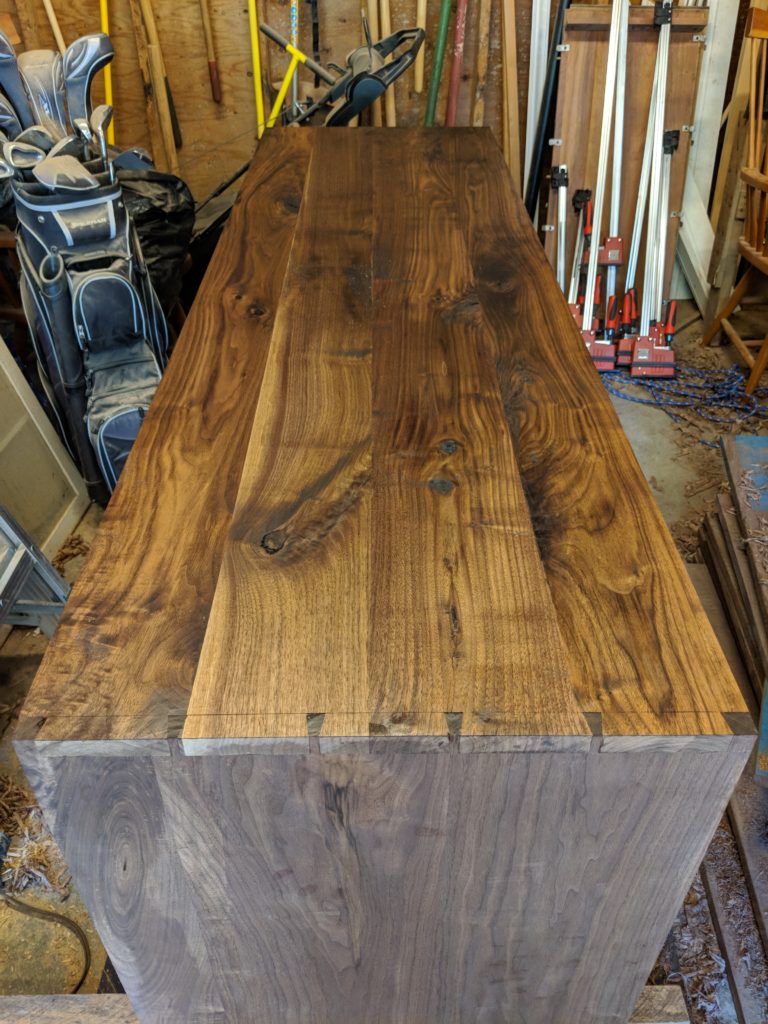
I intentionally marked the pins and tails 1/32″ long so they finished proud and could be trimmed flush. Since it was end grain, I used the low angle block plane to trim the pins and this went pretty easily because they were so narrow but when I started planing the tails, I realized this was going to be more time consuming since there was so much more material. Then I had a moment of inspiration that I am surprised in hindsight I had not considered before.
I went to my router with a flush trim bottom bearing bit and set the plunge depth so that the bearing referenced against the face and then trimmed the end grain of the tails flush to the surface. This worked amazingly well and I can’t believe I had never seen this done before.
Surface Prep and Finish
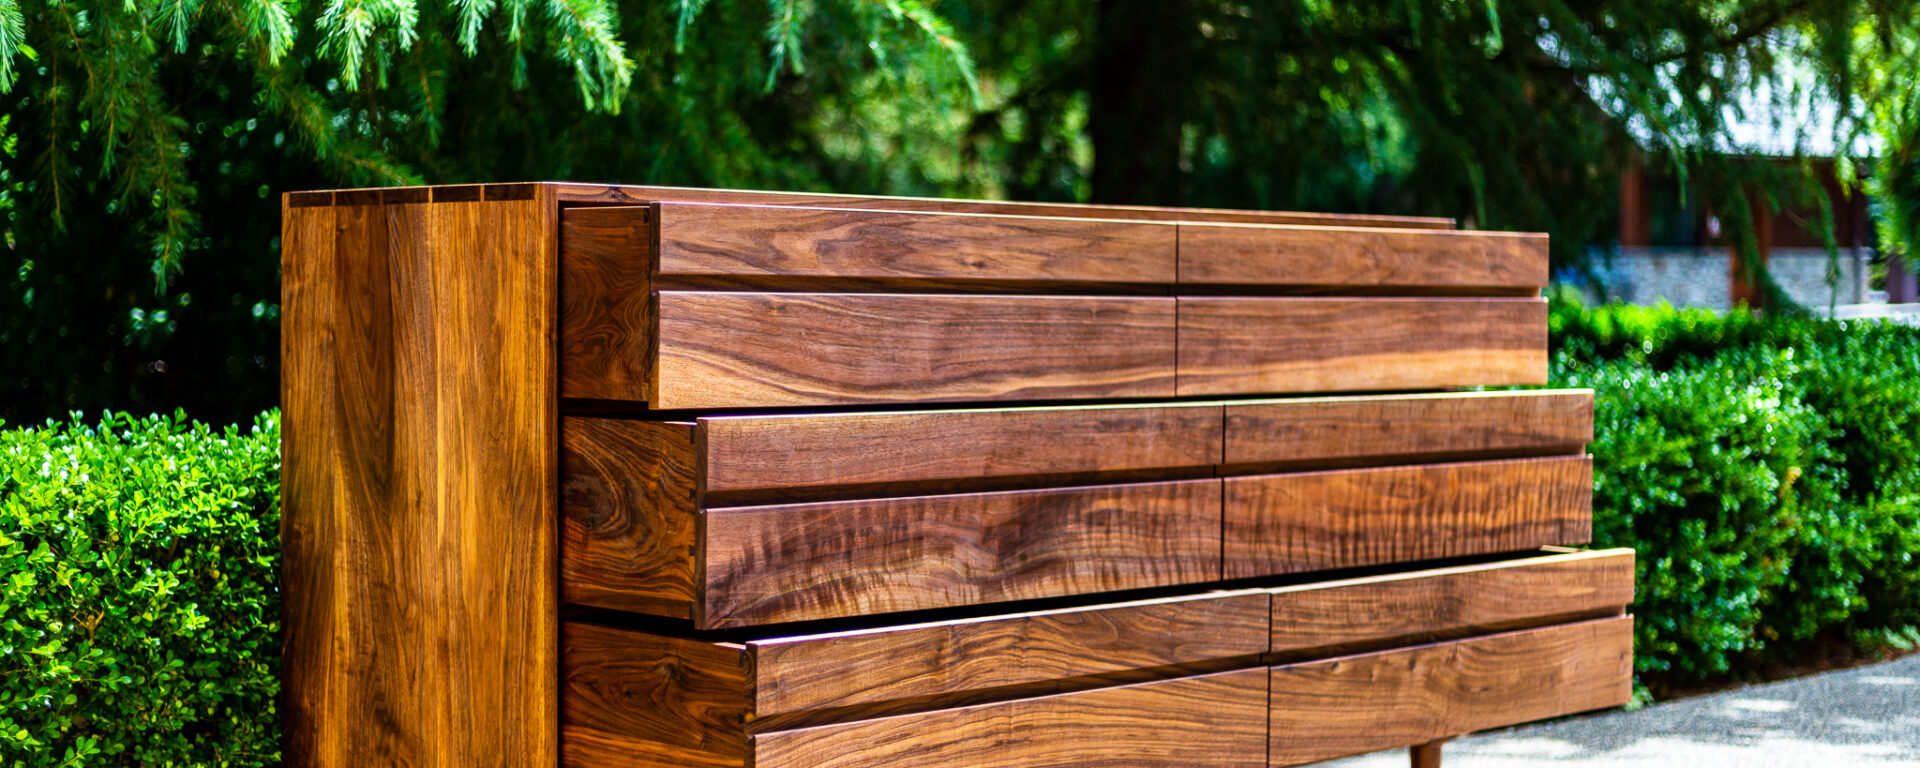
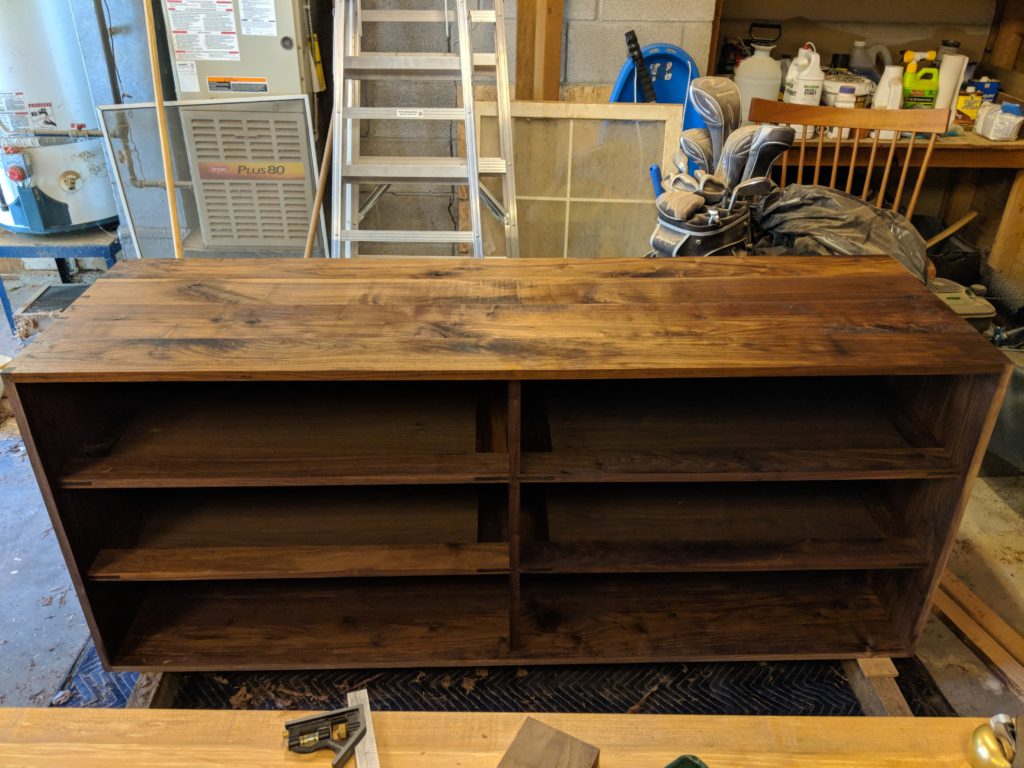
Now that the case was complete, it was time to prep the surfaces for finish. I mentioned at the beginning of this post that no sandpaper was used for surface prep on this project. I have heard from various sources that planed and scraped surfaces will take oil better than sanded surfaces because it shears the wood fibers as opposed to abrading them like sandpaper does. There is a YouTube video by The Wood Whisperer where he preforms a side by side test of planed vs. sanded surfaces that is worth a look. I decided to give this a try, not that I am against sandpaper (there were certainly times when I wished I could just grab my random orbit sander and be done with it) but I do agree that you can’t beat the polished look and feel of a surface left by a well tuned smoothing plane. For areas where the grain ran in all different directions, I went to my Lie-Nielsen scraper plane so as to avoid tear out. I applied two coats of the Danish oil and the result was an absolutely beautiful finish with depth of color and warmth that the below smartphone photo cannot accurately capture.
Up Next: Part 3 – The Base will continue the story by showing how I used SketchUp to model the Maloof joints to set the legs into the frame and attach everything to the case using buttons that allow for wood movement.