
Inspiration
It was the summer of 2017 and the time had come for me to buy a proper workbench and so I did what I always do when looking to make a large purchase; I did my research. I learned that there are essentially four styles of classic workbenches: the Roubo (France), the Scandinavian (Denmark), the Moravian (North Carolina) and the Nicholson (England). I then turned to craigslist to see which of the four styles were most available in my area and sadly discovered the options greatly lacking. All of the workbenches were either from Home Depot or were screwed together from construction grade lumber. So I waited and waited and after months of searching for a proper used workbench without any luck, I concluded that I had to build my own.
Design
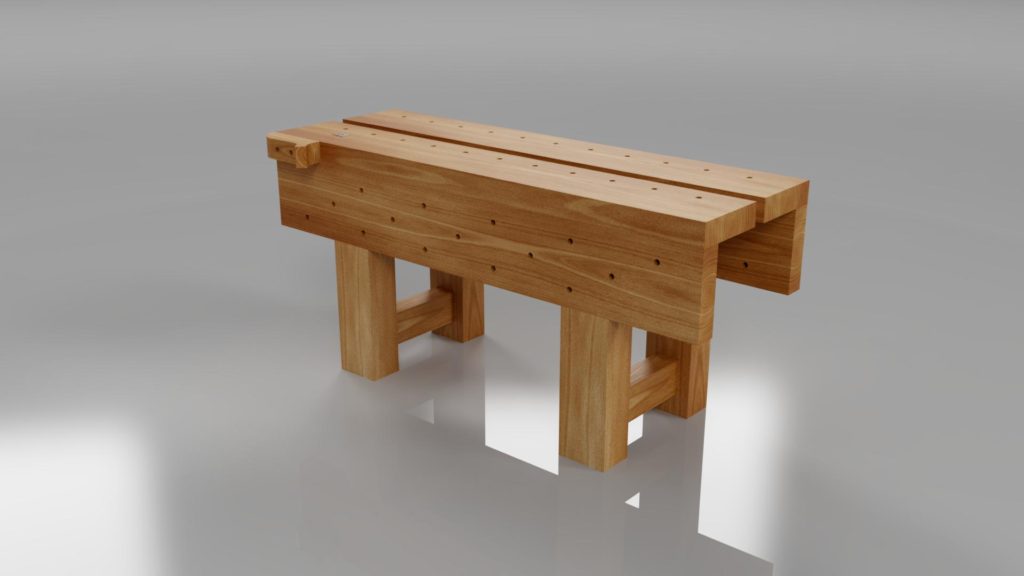
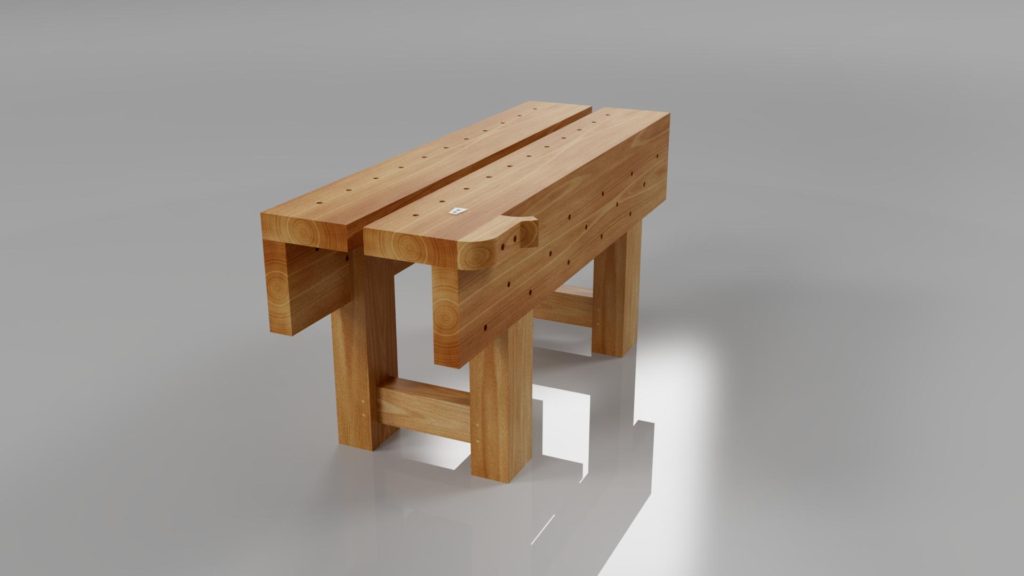
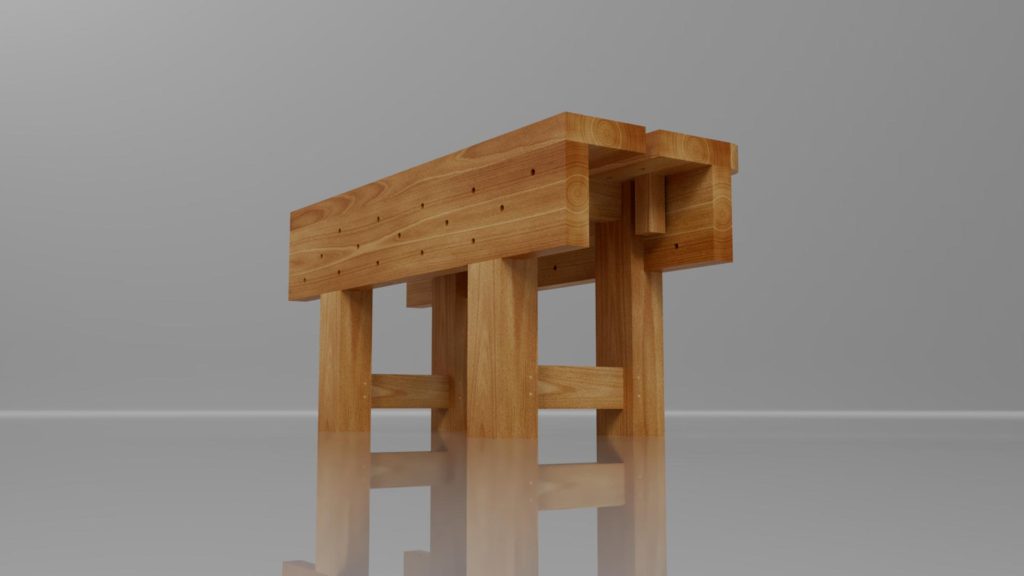
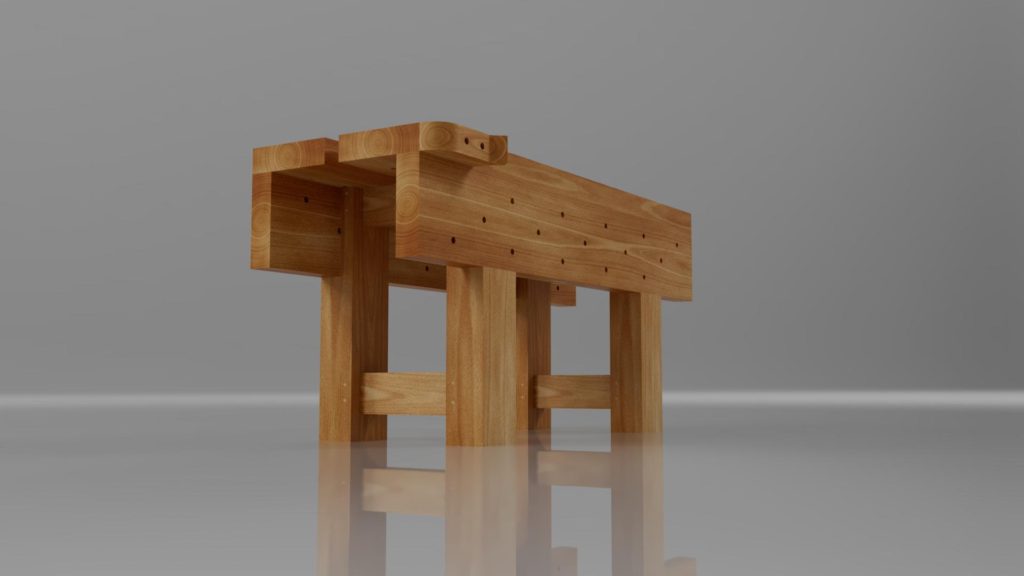
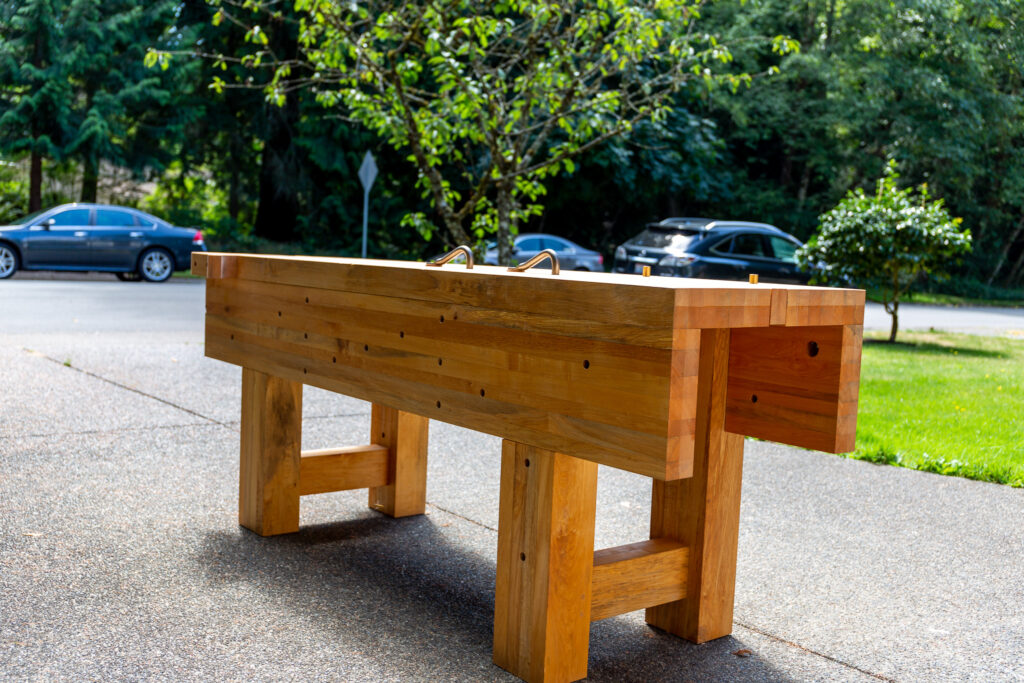
My research led me to Chris Schwartz who is probably the foremost authority on workbenches and has authored a few books on the subject. Chris maintains that one of the most important feature of a workbench is that the legs be in the same plane as the edge of the top. This allows boards to be supported vertically. A workbench really only needs to do three things: support a board so you can work on its edges, faces and ends. That’s it. Anything more is unnecessary and anything less is inadequate. I could see myself needing to work on boards in this vertical orientation and so I decided the Nicholson style of bench was for me because the tall side skirts would allow for the most vertical flexibility. I also liked that the Nicholson is generally considered a utility bench with more function than form especially when compared to the Roubo which is often appointed with fancy dovetail joinery, complex sliding deadmen, rare tropical hardwood details and expensive mechanical leg and tail vises.
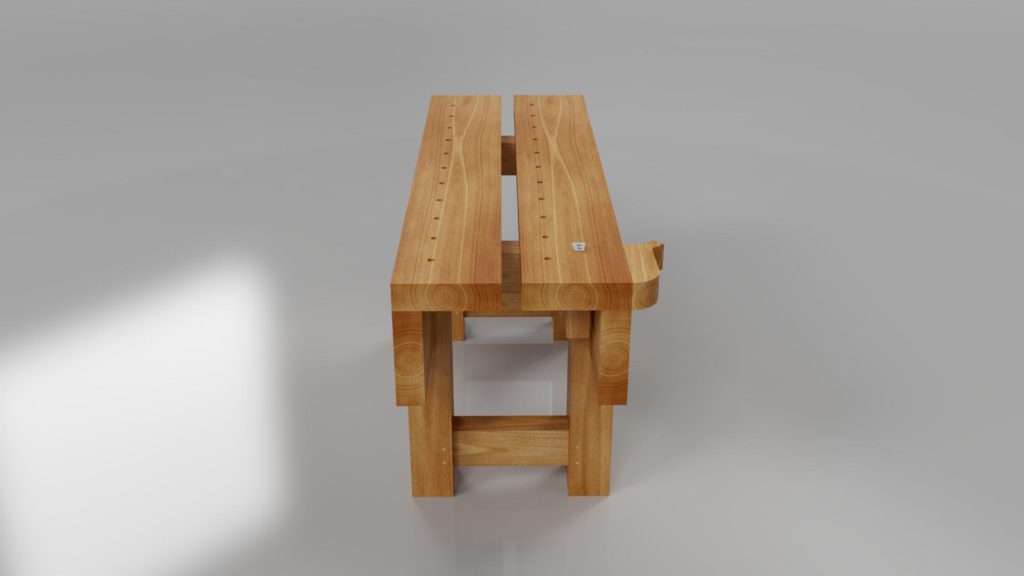
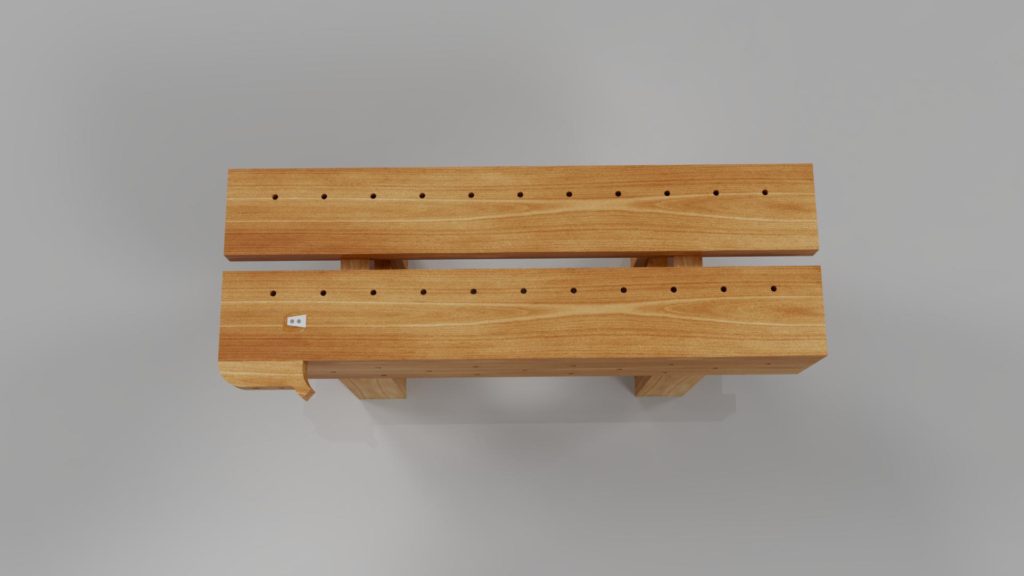
One of the features I didn’t like about the Nicholson is that the top is not as beefy as the Roubo top. I wanted this bench to be as thick as a Roubo but with the sides of a Nicholson. This meant laminating thinner boards together to make thicker slabs. I also knew that I wanted a split top. This would allow for more clamping options in the center of the bench but more importantly it meant that I could pass the narrower slabs through my thickness planer.
I spent a lot of time thinking about vises. In the end I decided to go with the classic viseless design, instead opting for the use of hold fasts to act as my vises. The classic workbenches as seen in the sketches by Andre-Jacob Roubo in “L’Art du Menuisier” did not include vises but instead utilized the crochet and planing stop to secure boards in place. In keeping with tradition, this is the route I chose.
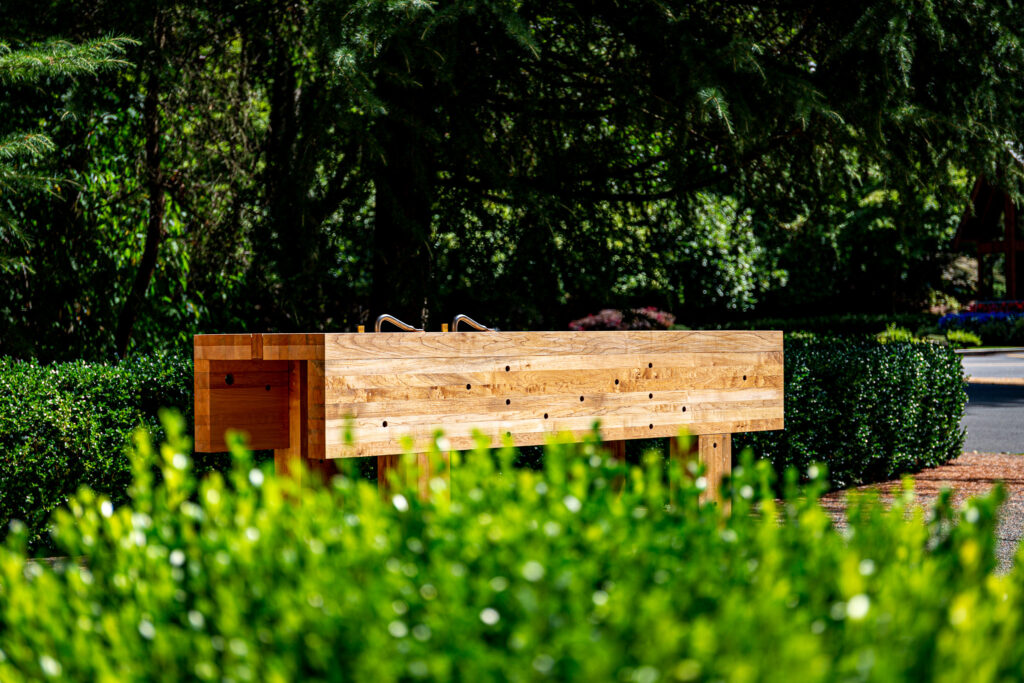
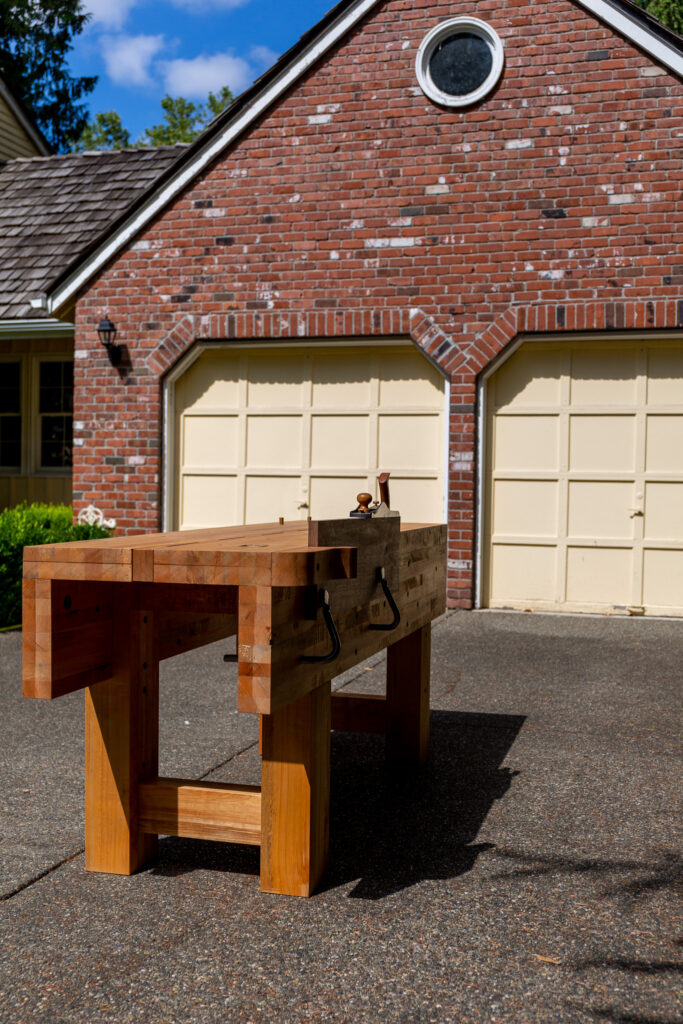
I also agonized over the overall dimensions. Most experts seem to agree that the height should be 34″ (table saw height) and width should be no more than 24″. Length can be as long as you can fit in your shop. The 34″ height means that an average height person can plane on it comfortably and the 24″ width means that you can lean over it and use the entire surface without straining your back. In the end I chose 34″ x 24″ x 7′ to give full length support to longer boards.
Rendering
I have been using SketchUp for many years to model my woodworking projects and have been very happy with it. Recently I was introduced to Autodesk Fusion 360 which is similar to SketchUp but seems more geared towards precision and 3D printing. I downloaded the free startup version since WoodNeighbor is a startup and meets the criteria. Modeling in Fusion 360 is slower going than SketchUp but changes are much easier to apply since it is based around parameters rather than sticky lines. I can see myself using SketchUp for conceptual drawings and Fusion 360 for the final model that will be used to make the project.
After modeling the workbench, I exported some high resolution renderings with the wood texture applied.
Modeling
Hold left click and drag to orbit the 3D model around. Scroll wheel on the mouse to zoom in/out. Double left click to re-position the orbit axis. Try the explode feature to see how the individual components are made.
Build
I found a guy on craigslist who had listed a huge pile of 8/4 soft maple that was rough sawn and had been drying for 10+ years. I didn’t have a truck so I asked if he would deliver and he reluctantly agreed. I think I paid around $400 for the whole lot with delivery; a good deal especially considering some of the maple turned out to have beautiful spalting in it.
Milling
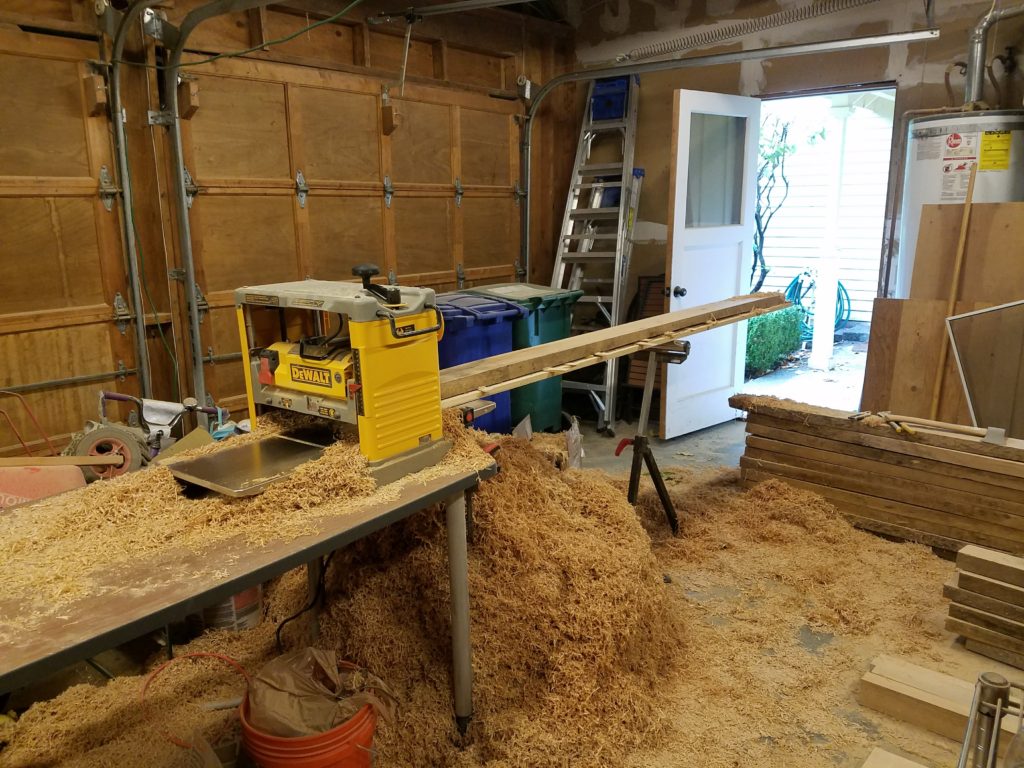
Since the stock was rough on all sides and I didn’t have a jointer, I made a planer sled and shimmed each board so it was supported on the sled. Then I planed one face flat which I could then flip over and plane the opposite face parallel. This created an exorbitant amount of saw dust that was not fully prepared for. I had to dispose of it over multiple weeks of filling up the yard/compost container to the brim. I didn’t rip the board edges quite yet because they would be planed down later in the process.
Laminating
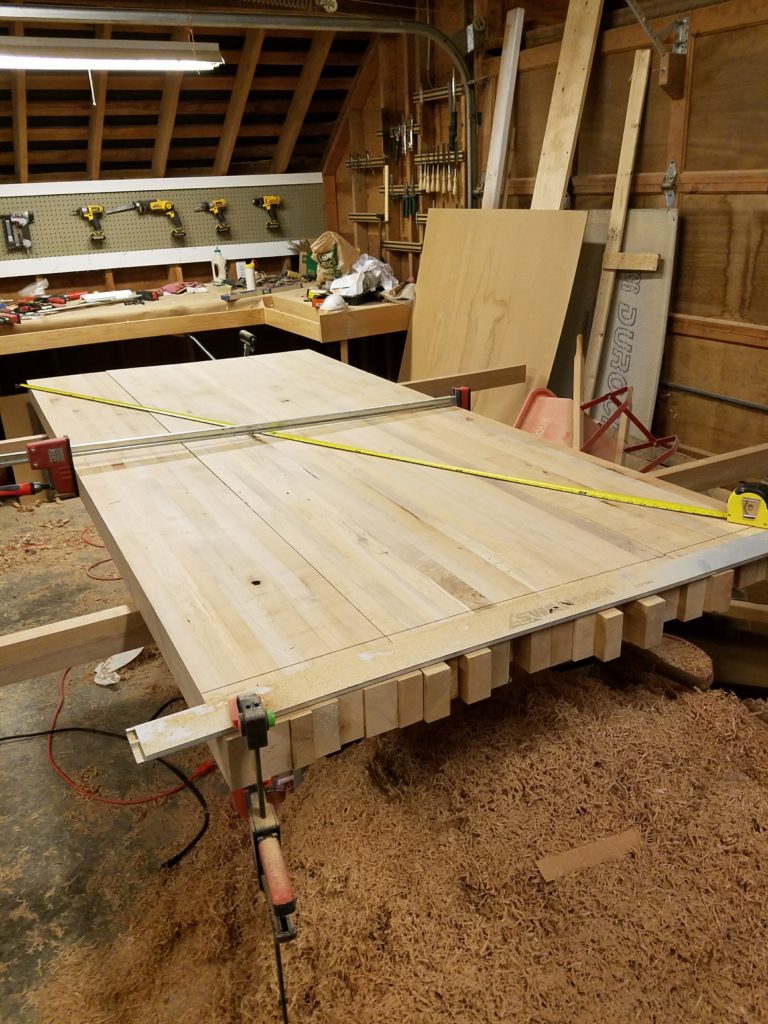
Once the maple was planed to thickness, I started gluing up the slabs. I used about 2/3 gallon of Tite-Bond II for this lamination. I rolled on the glue with a small paint roller and then used every clamp I had to clamp the pieces together. Then they dried overnight. In the morning, I unclamped them and ran them through the planer on each side to bring the top and sides to their final thickness. I didn’t have a track saw with a deep enough cut to crosscut the length in one pass so I had to flip the slabs over and make opposing cuts. Making the legs was the same operation just with wider boards.
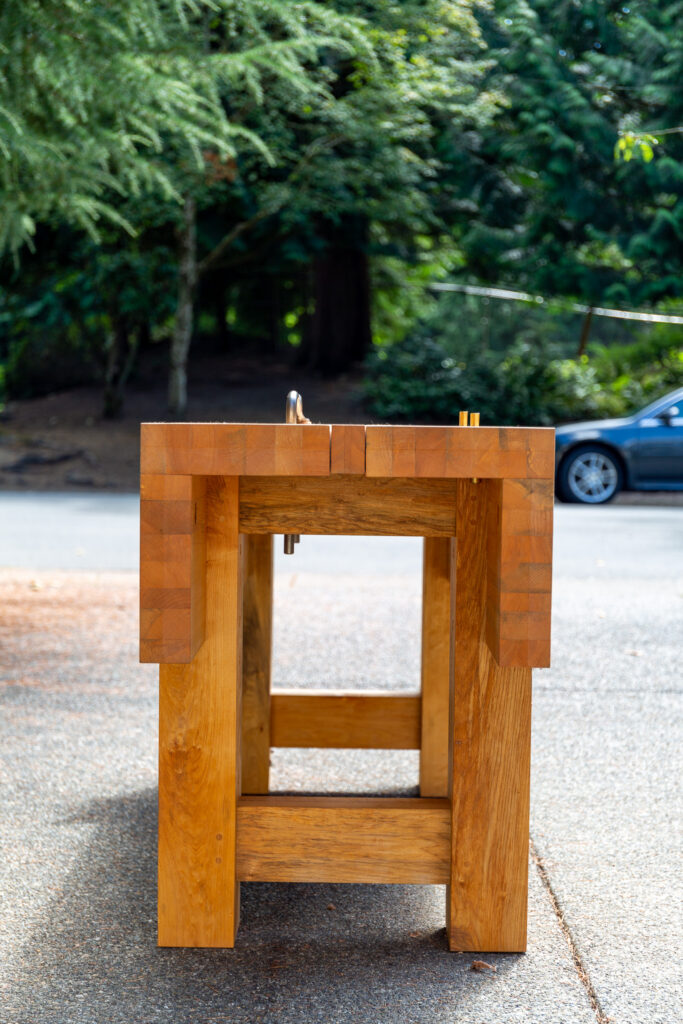
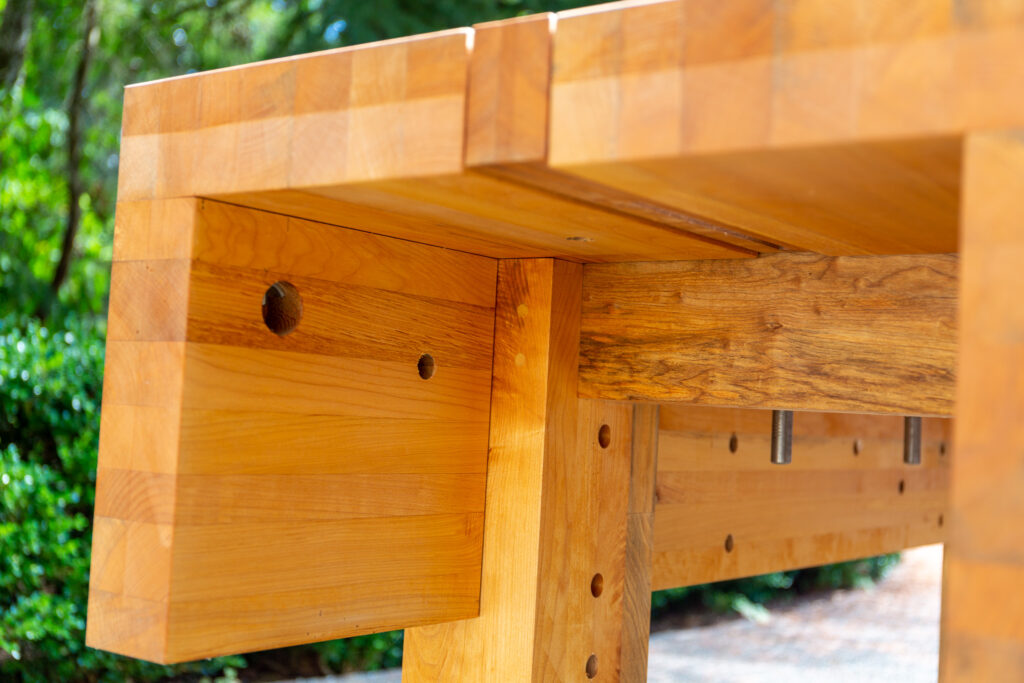
Legs & Stretchers
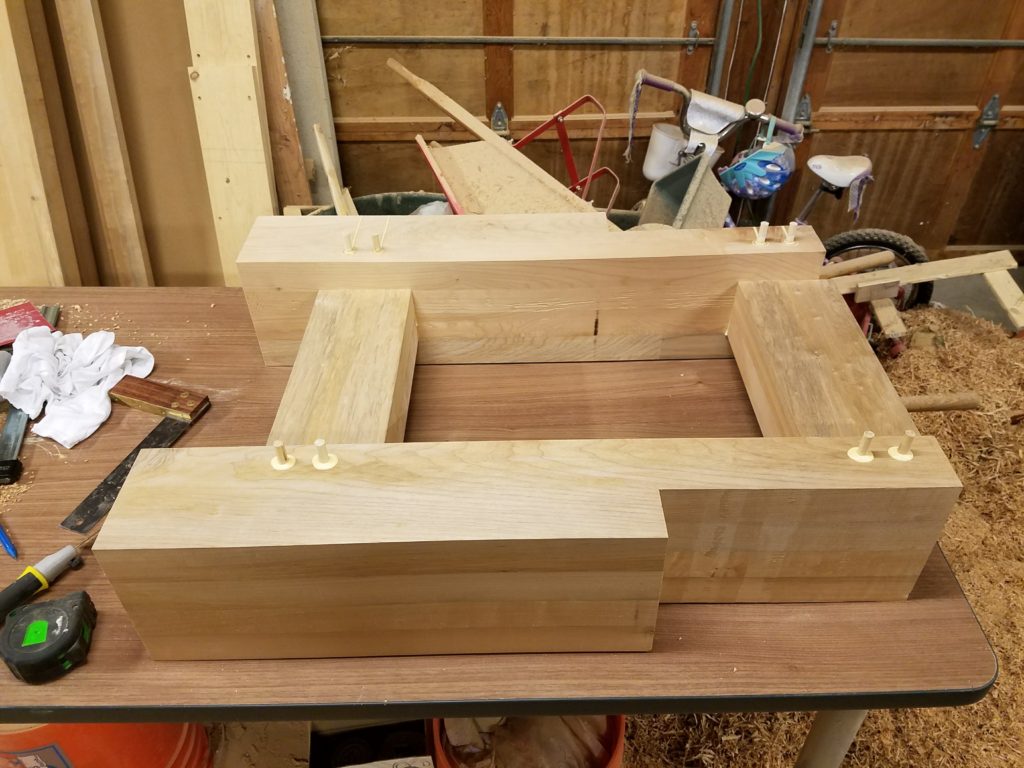
With the legs and stretchers laminated, I used a plunge router to remove most of the material for the mortises in the legs and squared them up with a chisel. With a table saw, I cut the cheeks and shoulders for the tenons in the stretchers and fit them ever so carefully to the mortises with a block plane. I always fit the tenons to the mortises, not the other way around.
I could have just glued the mortise and tenons together and that would probably have been good enough but I wanted this bench to last a lifetime so I decided early on that I would do draw bore mortise and tenons. Draw boring creates a very strong mechanical connection that is vastly more rigid than glue alone. This is accomplished by driving dowels through the leg and stretcher tenon but through holes that are offset. I drilled 1/4″ dowel holes in the legs and then fully inserted then tenons and marked where the holes intersected the tenons. Then I removed the tenons and measured inwards (towards the shoulder) by 1/16″ and drilled 1/4″ holes in the tenons. I applied glue to the mortise and tenons and reassembled the joints. The dowels were made of straight grain beech with a bevel cut into one end like a pencil. When I drove the dowels into the holes, the bevel caught the offset in the tenon and pulled the joint tight together by bending around the offset hole and then returning into the hole in the opposite side of the mortise. Applying glue to the dowel acts as a lubricant to drive it through this difficult connection. No clamps needed for this glue up as the joint is already held together as tight as it can be.
Assembly
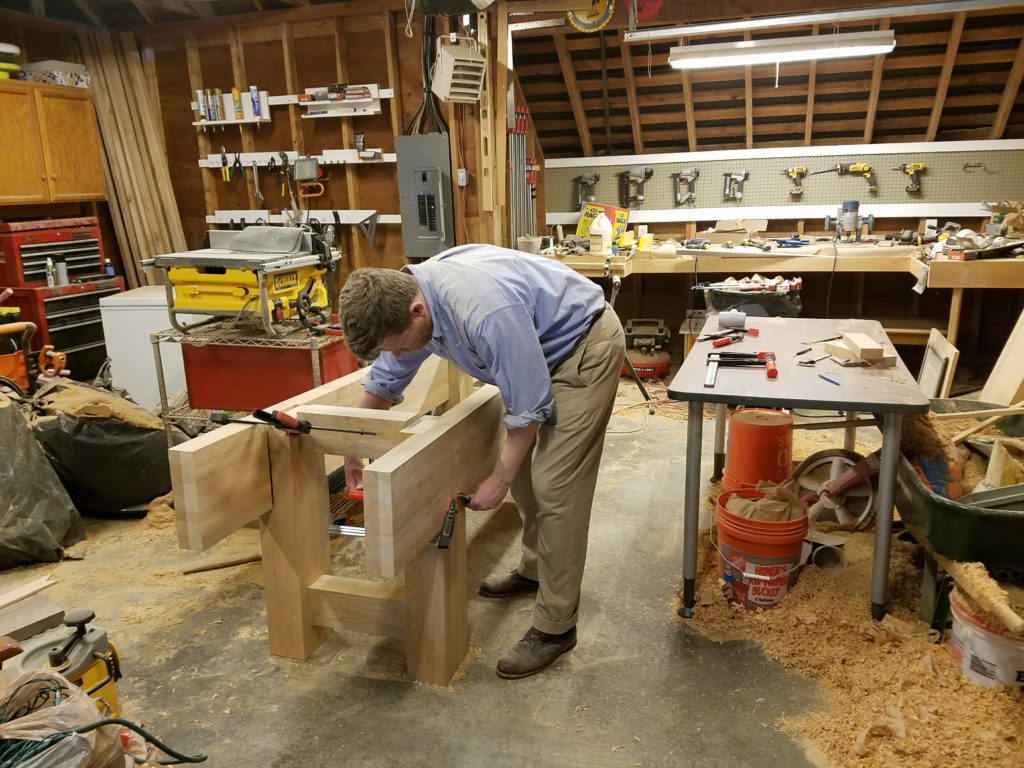
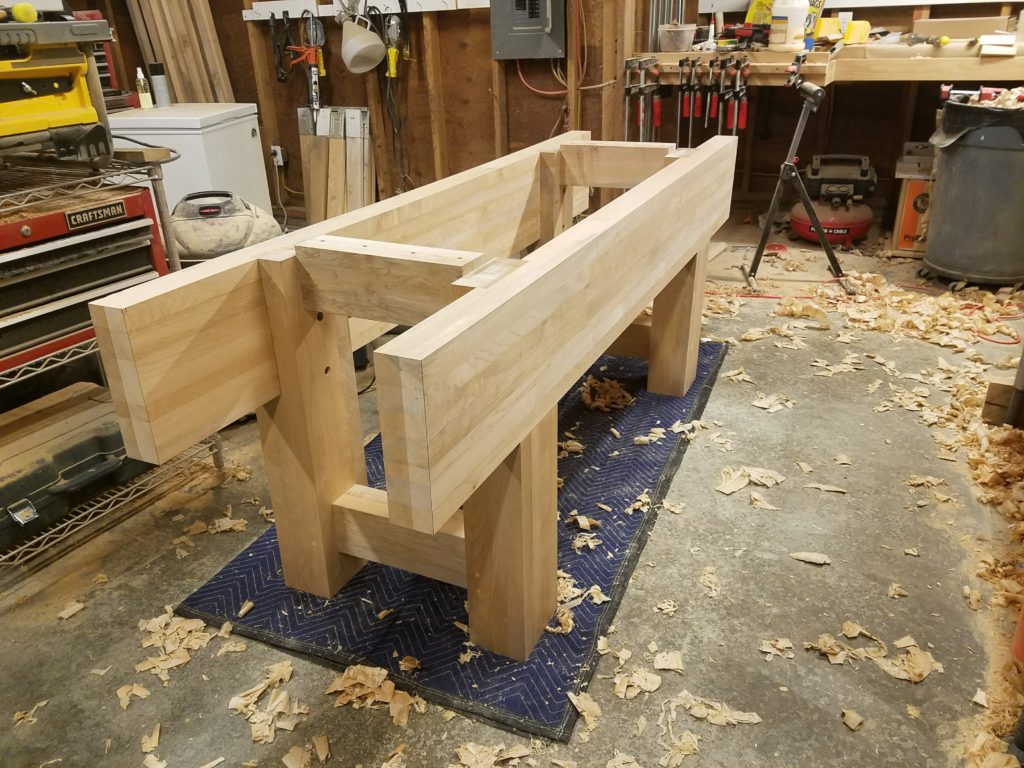
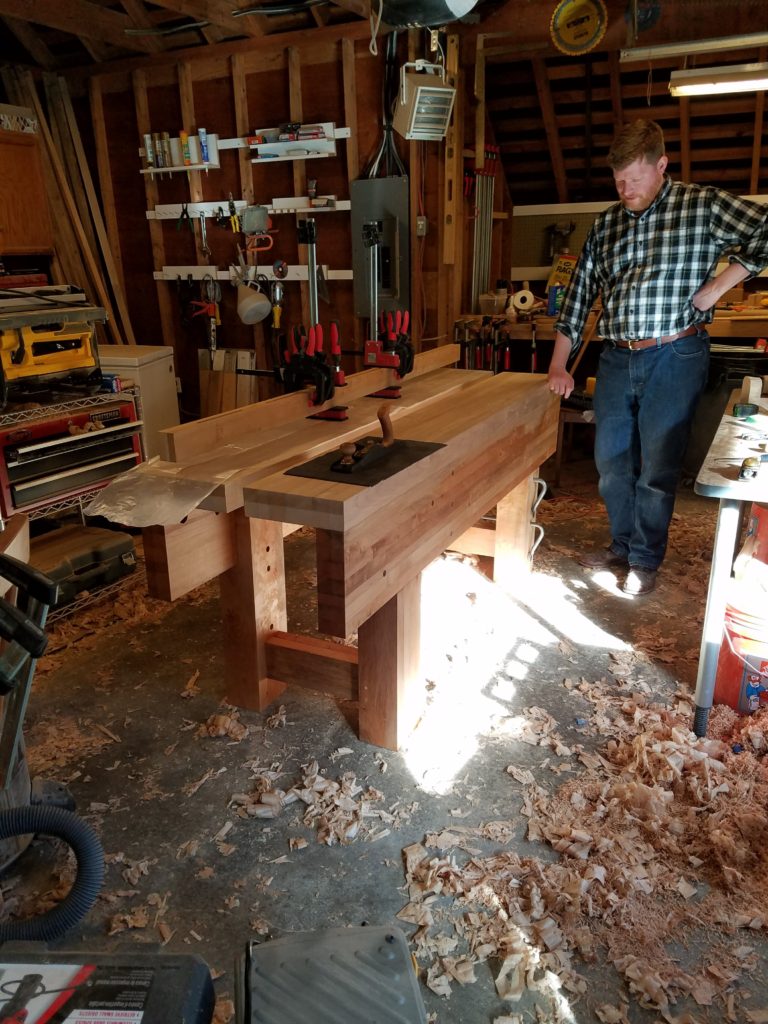
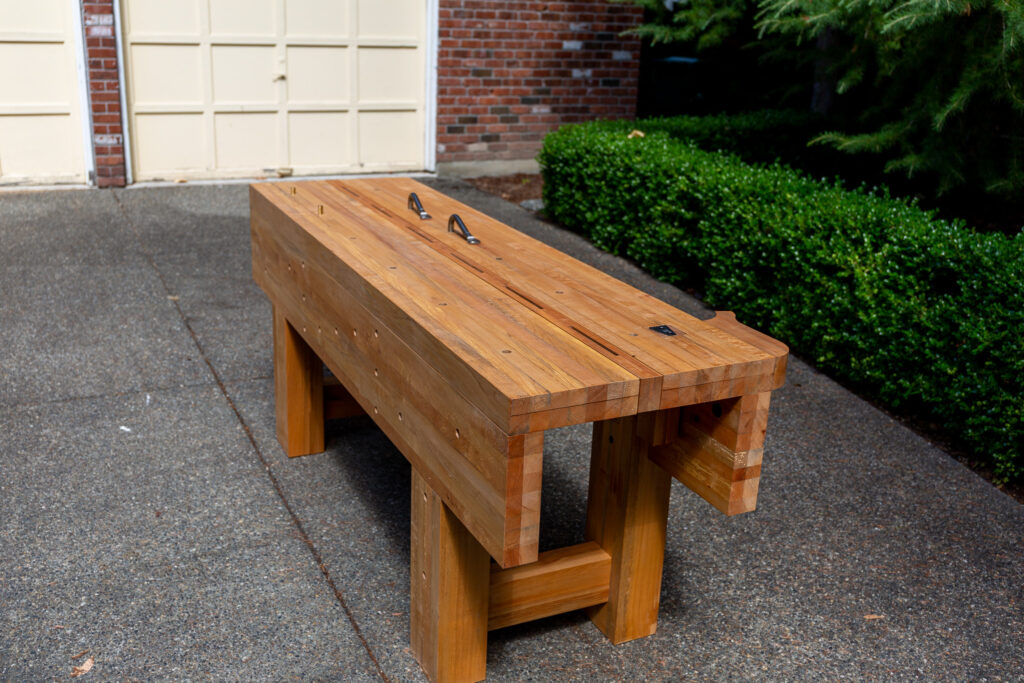
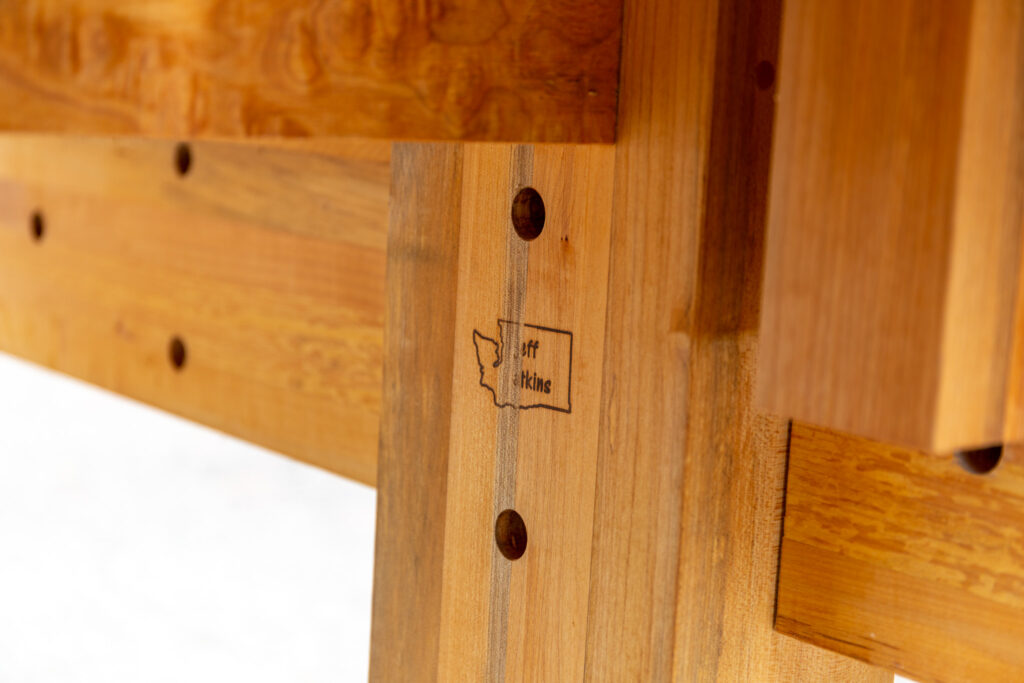
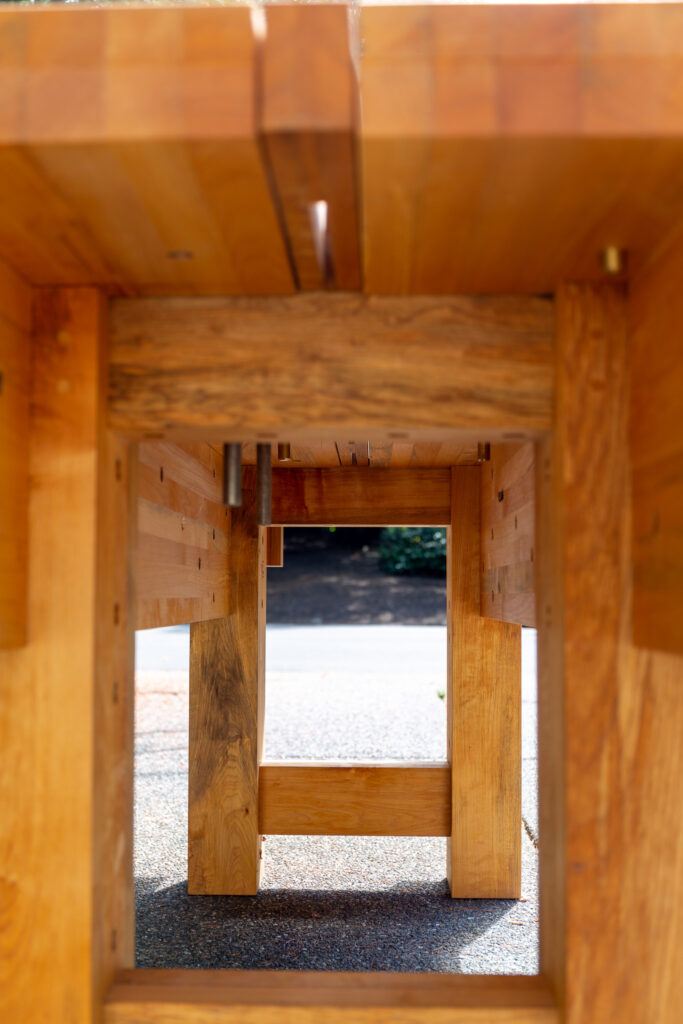
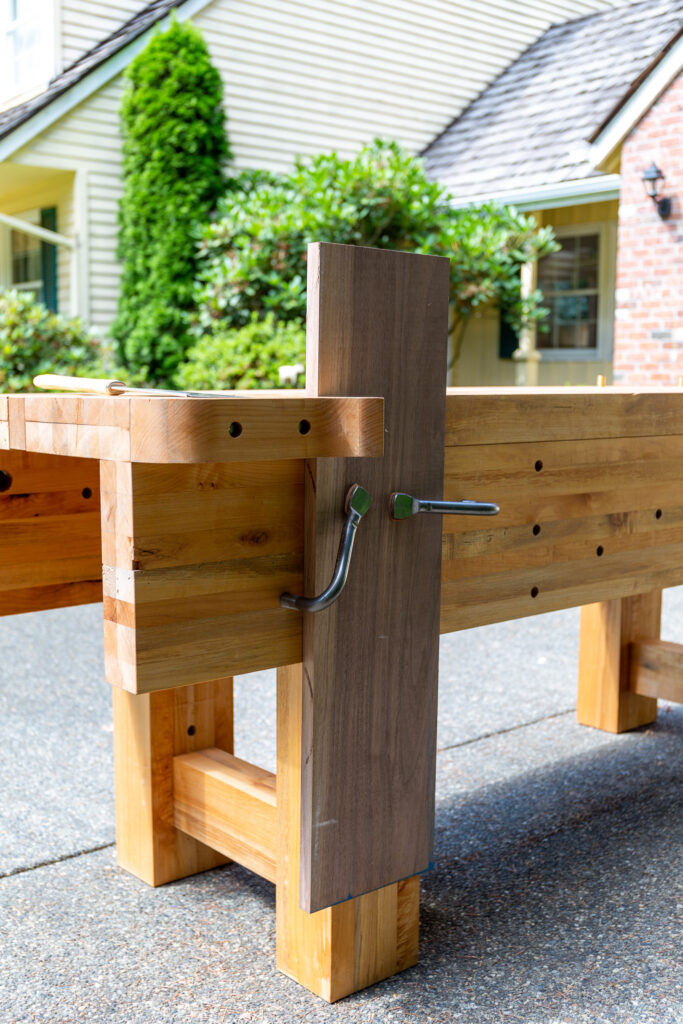
It occurred to me that someday, when the kids are in college, we might sell this house and relocating a workbench of this size in one piece could prove difficult. In addition, workbenches that are glued into one solid piece do have a tendency to crack apart with wood expansion. Bolting the workbench together instead of gluing it together addressed both of these concerns. I used stainless steel lag bolts to connect the side skirts and top slabs to the legs frame. It was at the point that the overall size and scale of the bench started to take shape.
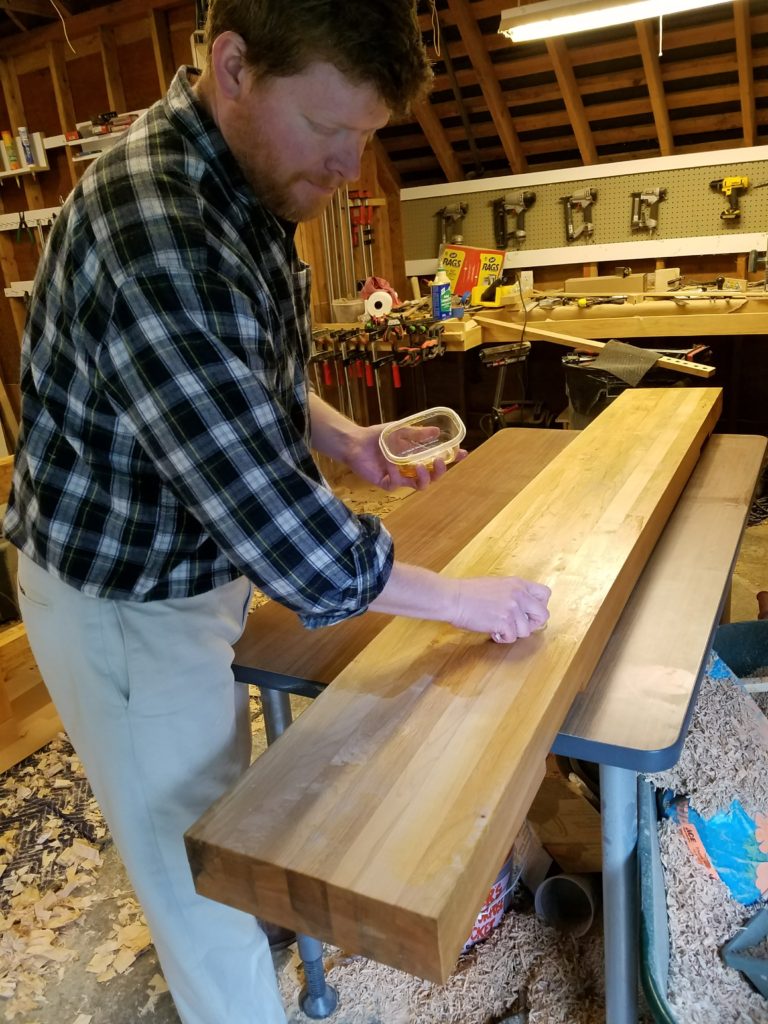
A workbench needs to be dead flat so I used my Lie-Nielsen low angle jack plane to go over the entire top and sides first in a crisscrossing diagonal pattern to level the bench across its width and then with the grain to flatten the bench along its length. No sand paper needed for this workbench because you don’t really want a glass smooth surface. You want a bit of rough texture so projects don’t slide off the bench.
I applied a boiled linseed oil finish that didn’t change the color of the maple but made the figure in the grain pop. There are some areas that have quilting and also some spalting that really makes this workbench unique.
Accessories
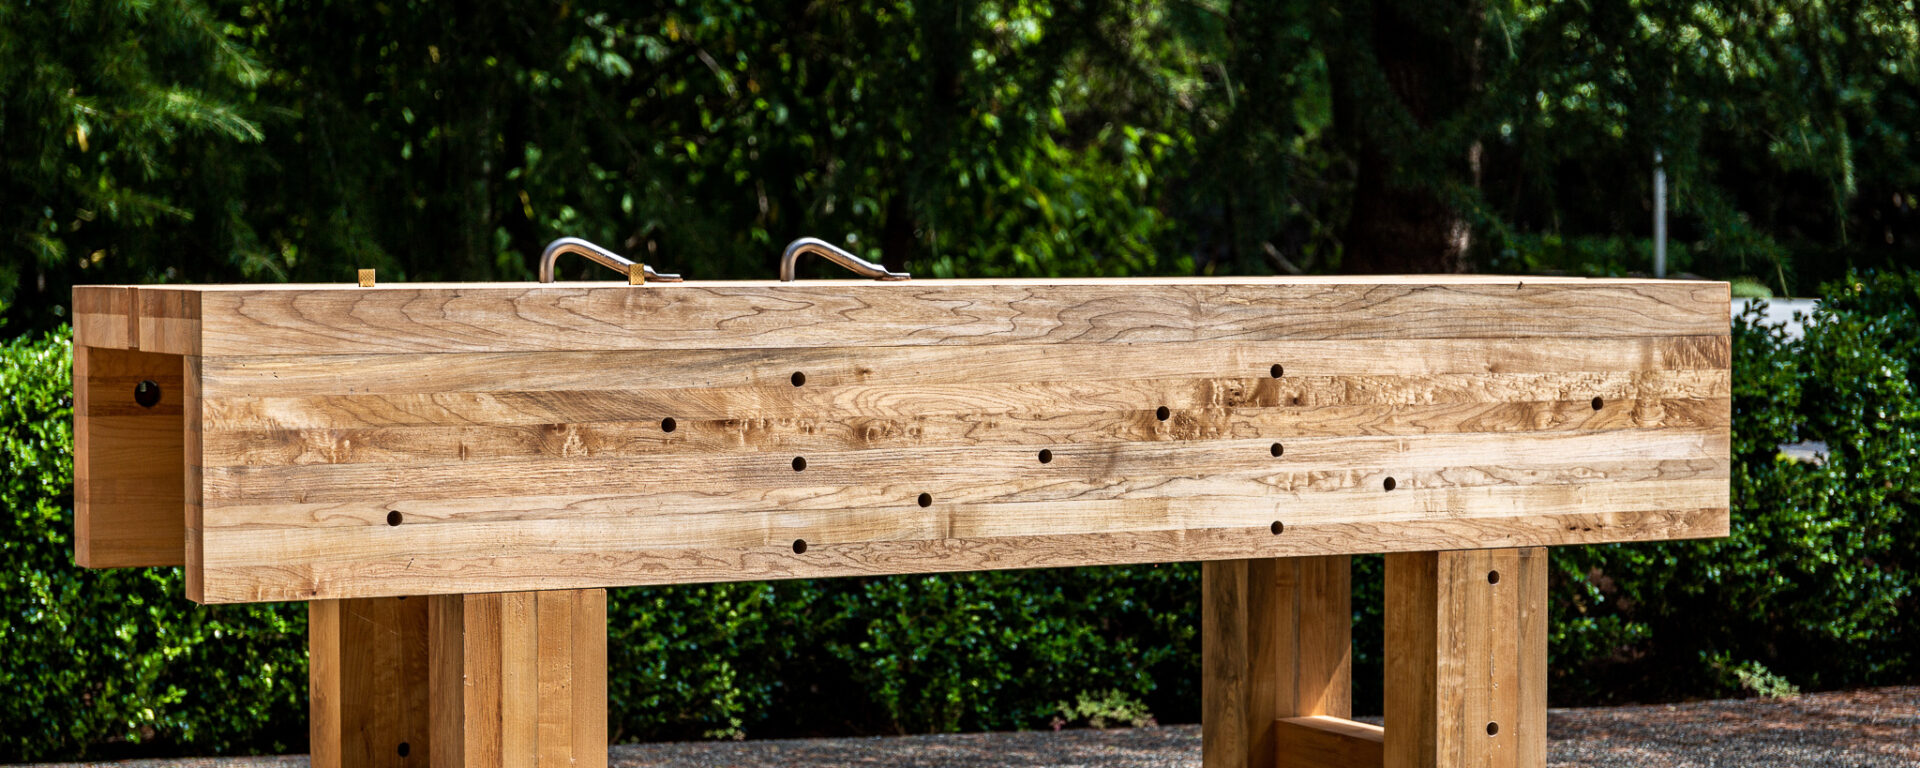
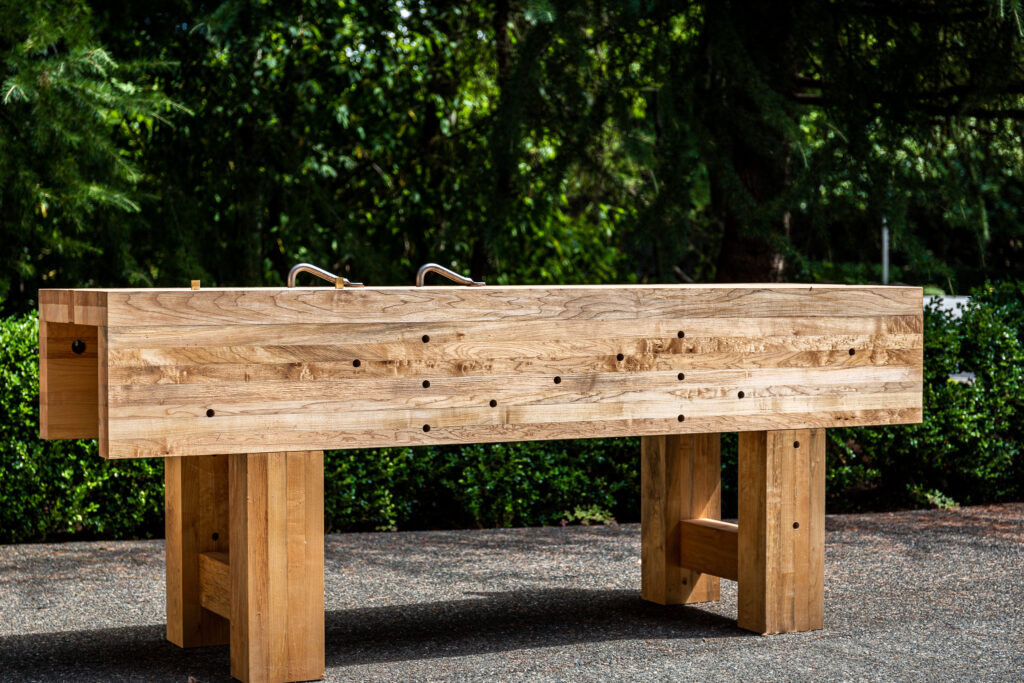
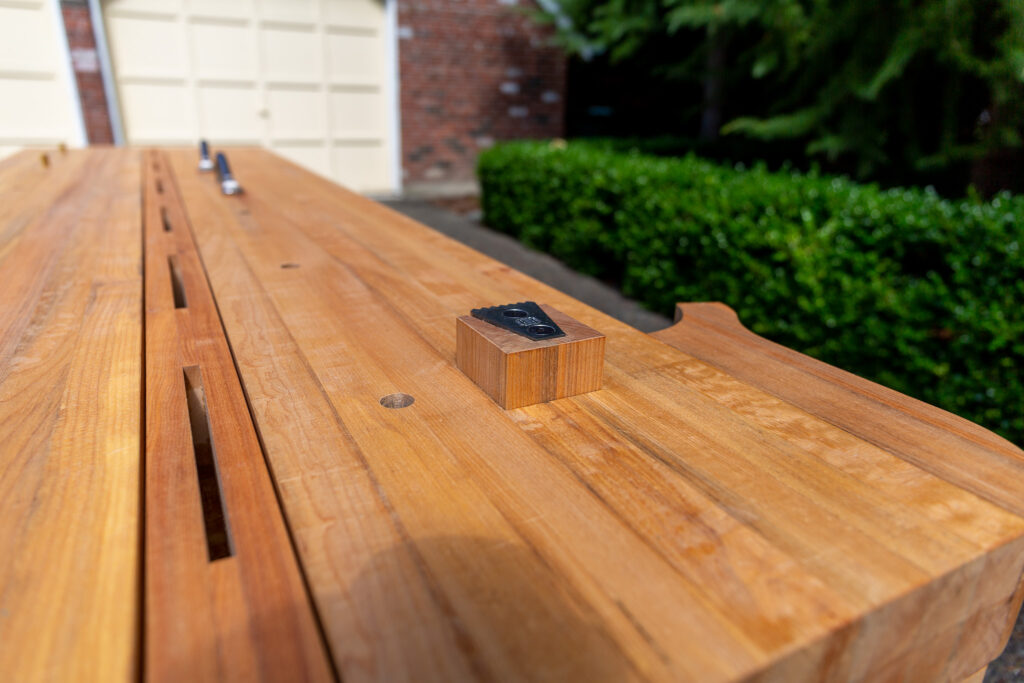
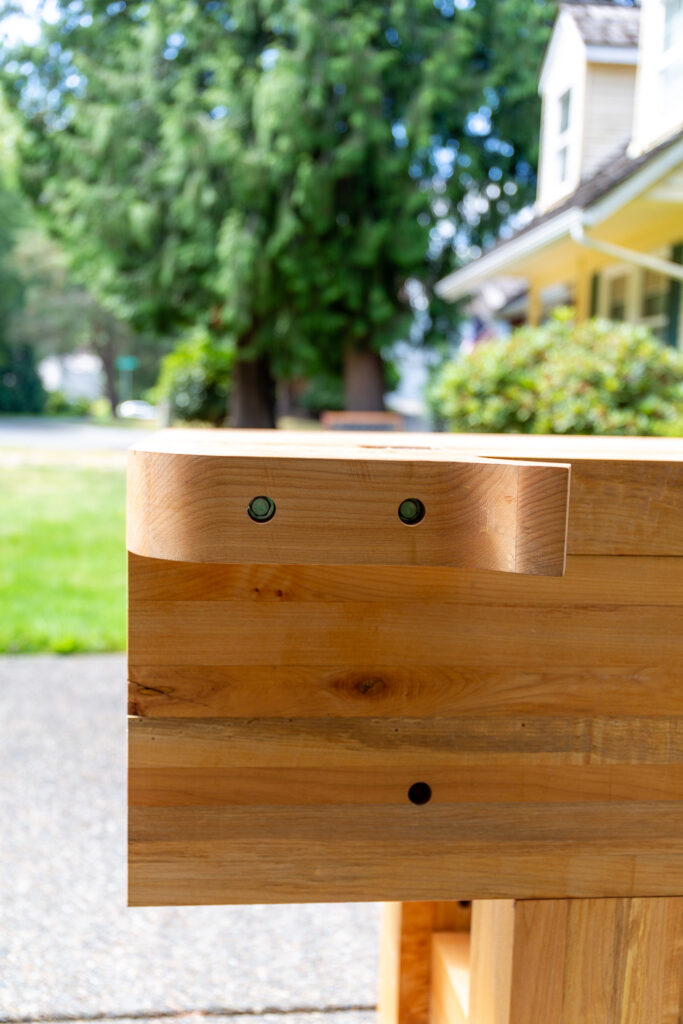
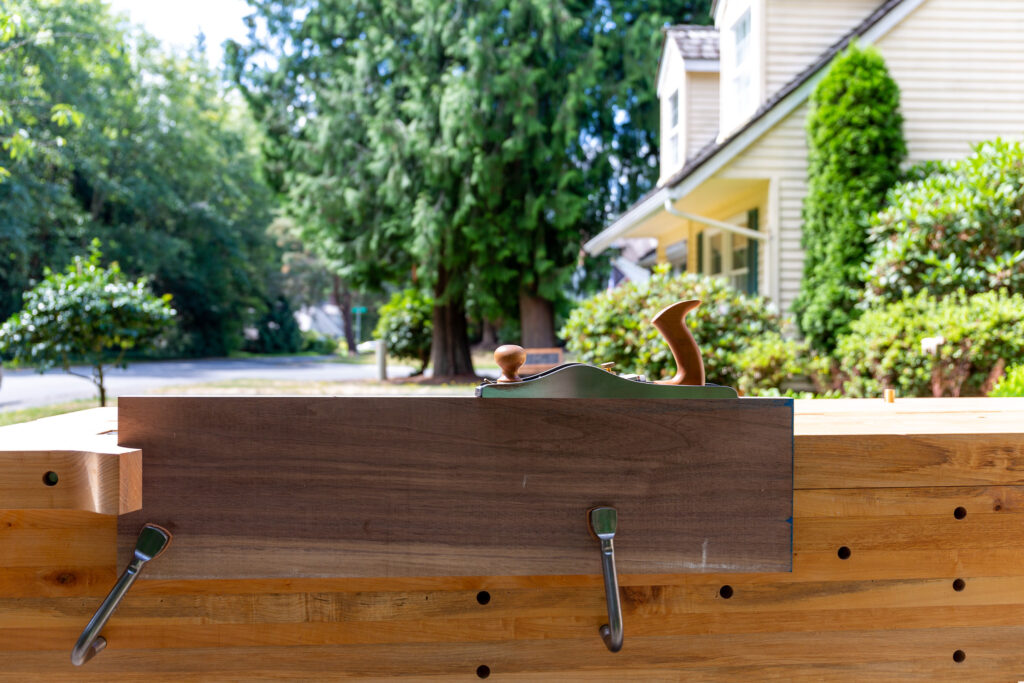
Dog holes: I see a lot of benches with way too many holes drilled in them. With some careful planning, you can get away with very few dog holes which is more appealing in my opinion. The Gramercy Tools hold fasts have a 6″ radius of reach meaning you can space dog holes 12″ apart and be able to cover every square inch of workbench surface. The hole pattern on the side skirts is staggered such that a board of any width can be secured to the workbench and planed on its edge. I recommend the 3/4″ Wool Owl auger bit for this job. It can drill a clean hole in a matter of seconds.
Crochet: This detail appears on classic workbenches of centuries ago and is as useful today as it was then. The crochet provides a stop so that boards cannot slide forward when planing on their edges. I used my wife’s Cricut pattern cutting machine to design and cut out a paper template of the crochet profile I liked which I then traced onto some leftover maple scraps and cut out on the band saw. Then I sanded the band saw marks smooth and attached it to the side of the bench top with stainless steel lag bolts. It’s not going anywhere.
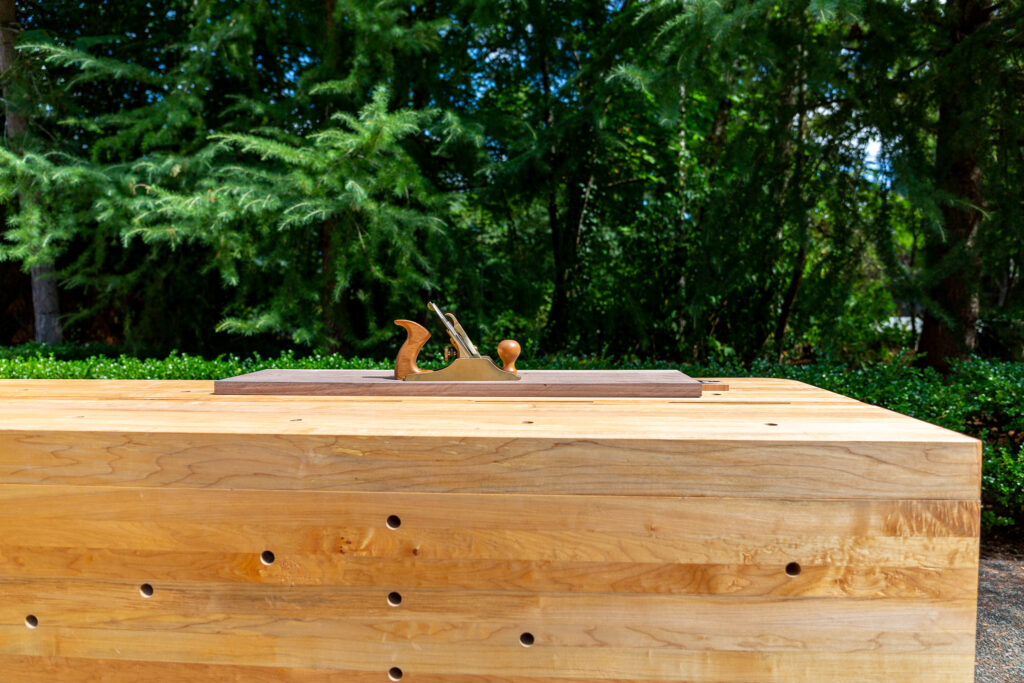
Planing stop: Similar to the crochet, the planing stop appears on old jointers workbenches of ages ago and has the same purpose as the crochet in that it keeps the board from sliding forward when being planed upon. The difference here is that it is meant to secure the board when planing on its face instead of on its edge. I purchased the metal claw for the planing stop from Benchcrafted and used some scrap maple for the riser block. I drilled out a square section of the workbench and used a variety of chisels and files to very slowly create a perfectly square hole. Then I slowly fit the maple riser block to the square hole by taking shavings with my hand plane until there was a piston fit. This tight fit means the planing stop will stay at the height you set it without dropping down. I recessed a space in the top of the riser block for the Benchcrafted claw and secured it with the bolts provided in the package.
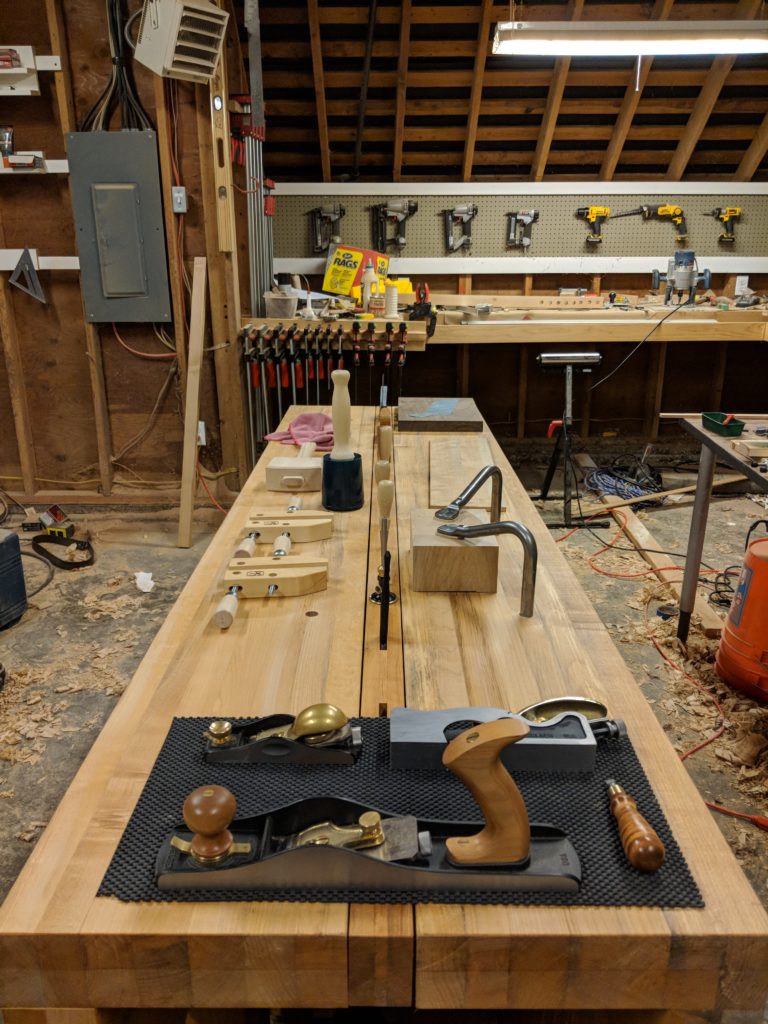
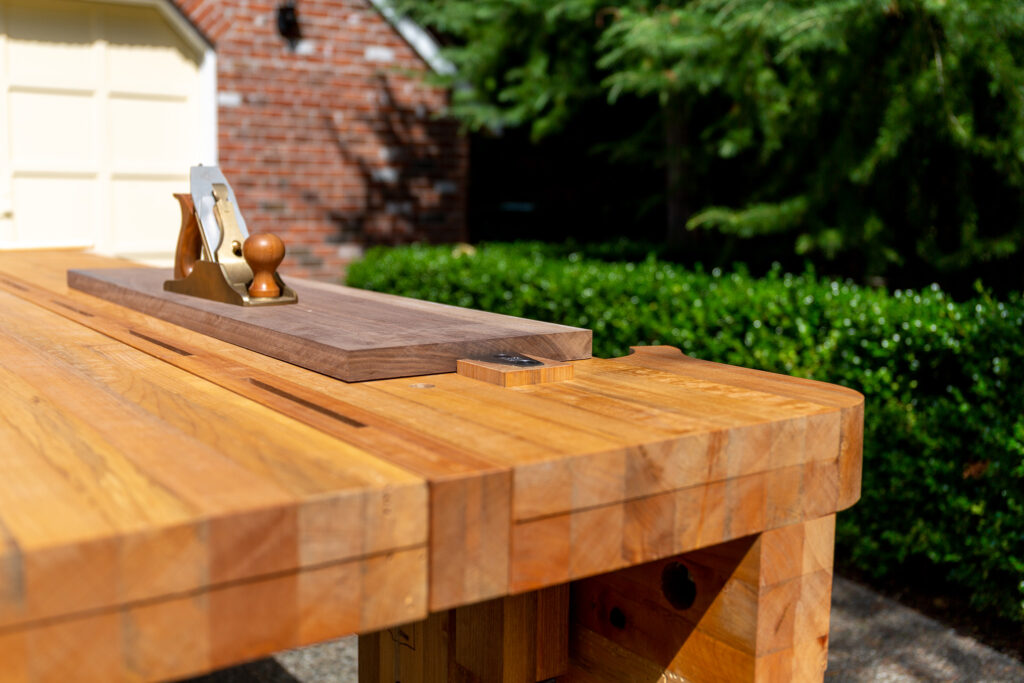
Center divider: Besides providing a way keep tools off the work surface and creating a way to fill the gap between the two top slabs so that tools don’t fall in between them, the center divider also can be used as a planing stop by lifting it up 1/2″ above the bench top and abutting boards up against it. A stop in this orientation can be advantageous when planing across the grain when roughing a board for example. When finished, the center divider can by recessed back flat with the bench top to be out of the way. I made mine out of a maple board that was resawn with the band saw and planed smooth. Then 3/8″ thick spacers were glued between the resawn halves to create slots for tools. I determined 3/8″ was the perfect slot width because my Lie-Nielsen socket chisels will fit into them and not tip over. Along with chisels, these slots are handy for dovetail saws, combination squares, calipers and marking knives although I admit that I don’t conscientiously use them as much as I thought I would and often resort to laying tools flat on the bench top out of habit. This of course defeats the purpose.
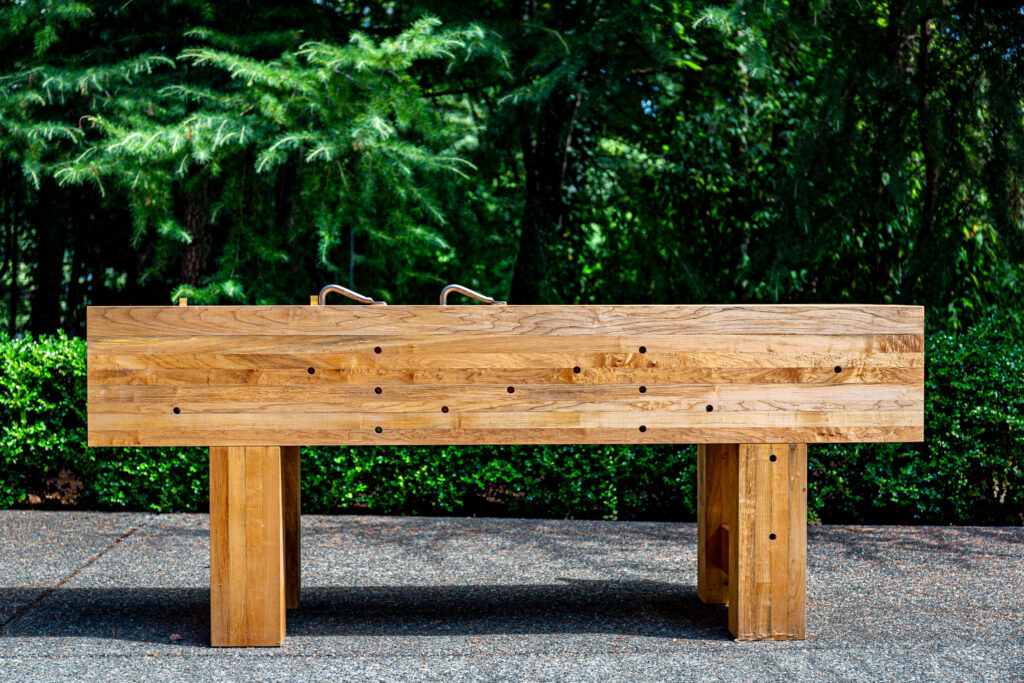
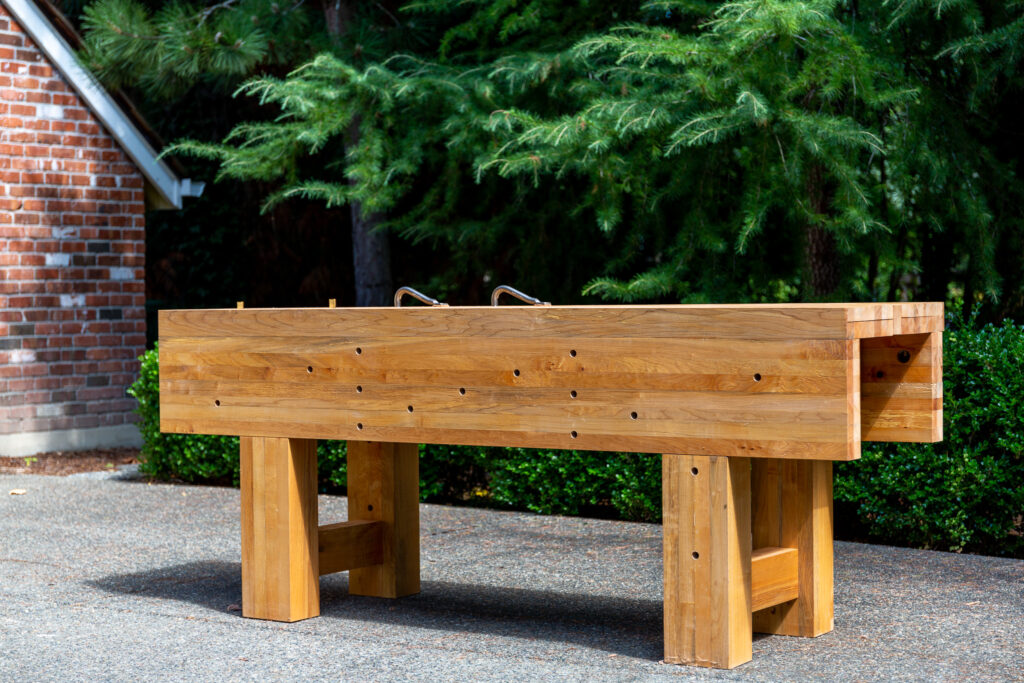
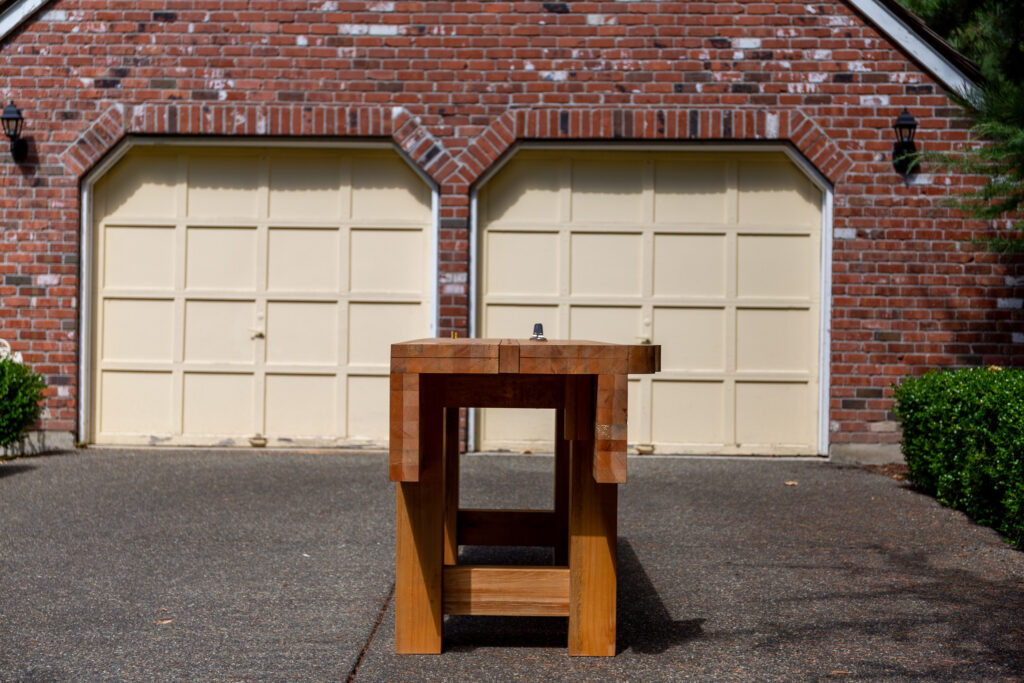
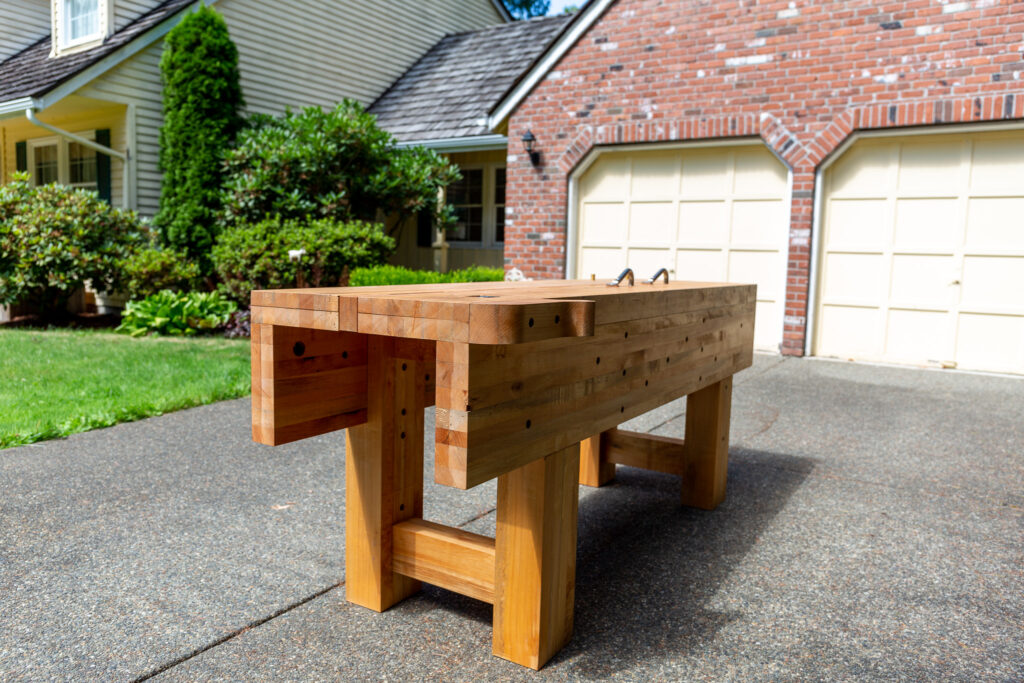
Photo Gallery
Shot on a Canon 5D Mark III with Canon 24-70mm F/4L IS USM lens. Edited in Adobe Lightroom. Enjoy…

Thoughts
This thing is a beast. I tell people that you could run into it with your car and it would do more damage to your car. I estimate it weighs 270 pounds and is beefy enough that it doesn’t budge an inch when leaning into it. I have seen a lot of Nicholson style benches online but nothing like this. I love that it is so simple (just a big rectangular cube with holes) but does everything it needs to and nothing it doesn’t. It’s truly one of a kind and I expect it will be the last bench that I own.
Although this bench doesn’t need a vise and can do every operation that a bench with a vise can do, I am considering adding a twin screw vise just because it is faster clamping and unclamping stock with a vise than with the hold fasts. This will probably be my next project.